Text Anonymization Guide
Audience: first-time users configuring a Zapier workflow to call the Anonymator API.
1️⃣ Overview
This guide walks you through how to configure a Zapier workflow using the Webhooks by Zapier app to send a POST request to the Anonymator API for text anonymization.
You’ll learn how to:
- Add the Webhooks module
- Choose the correct action event
- Configure the Custom Request node
- Set up authentication
- Define the JSON request body
- Execute and verify the anonymized output
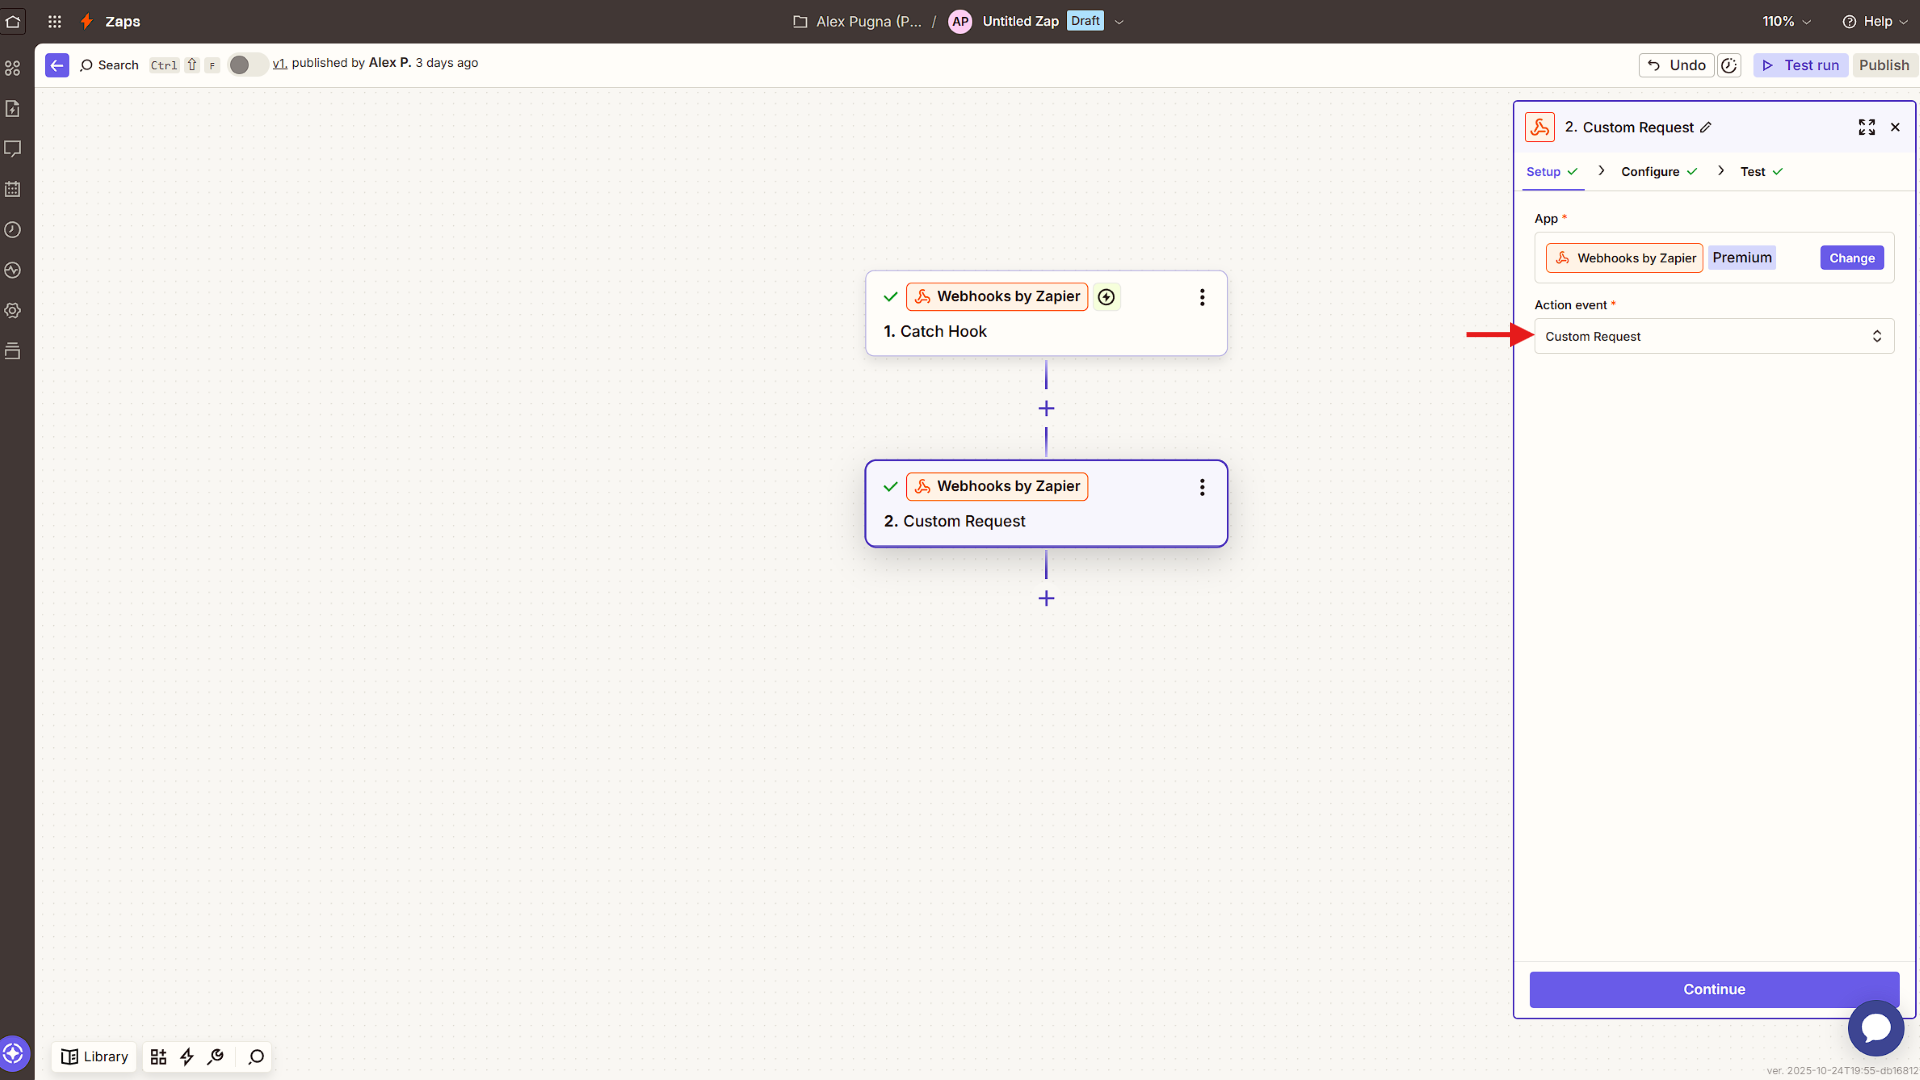
2️⃣ Add the Webhooks Module
In your Zapier workflow, add a new step and select Webhooks by Zapier as the app.
Then, under Action Event, choose Custom Request — this option lets you send a fully customized HTTP POST request to the Anonymator API.
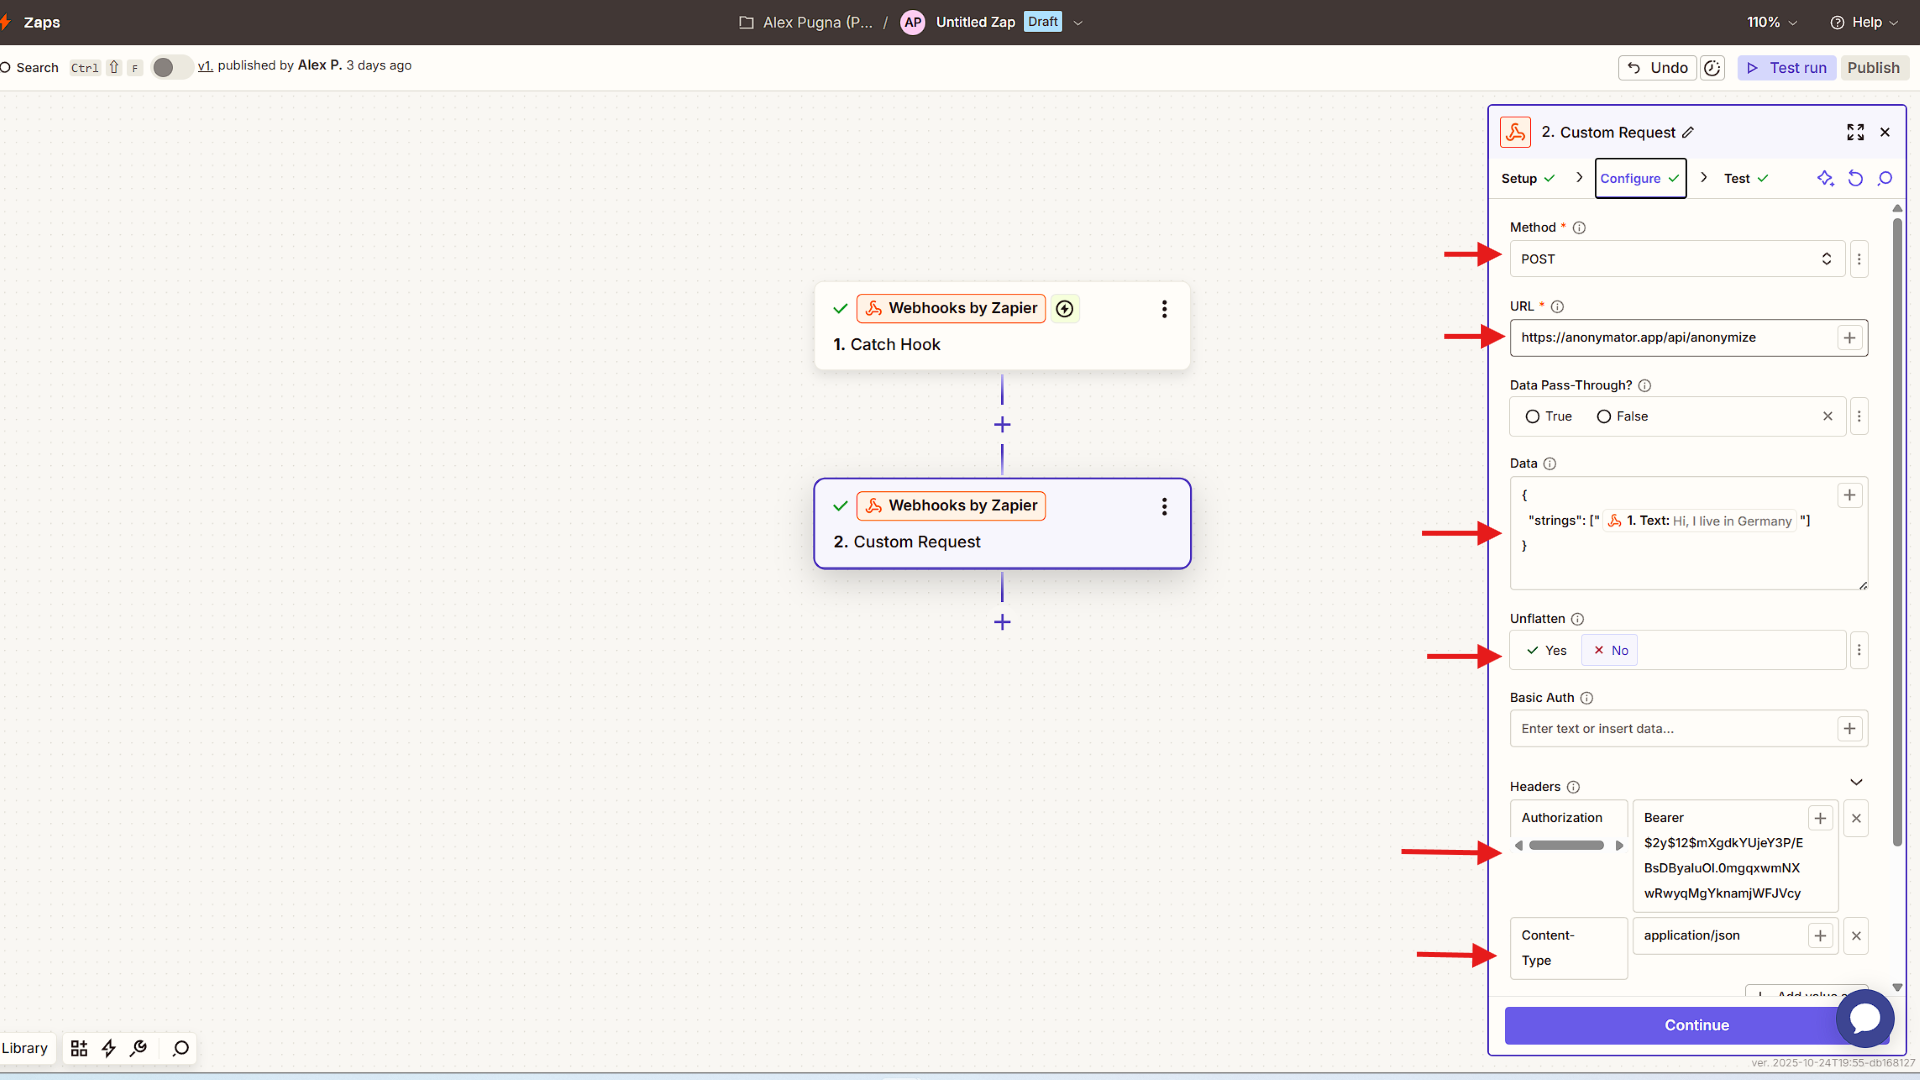
3️⃣ Configure the Custom Request
Set up the Webhooks by Zapier → Custom Request action exactly like below.
Method
POST
URL
https://anonymator.app/api/anonymize
Data Pass-Through
False
Data (Body) Paste JSON and map your text variable inside the array:
Code
Unflatten
Yes
Headers
- Authorization:
Bearer $2y$12$… - Content-Type:
application/json
🔐 The
Authorizationheader must include your API key from the Anonymator Portal.
Keep this key private — never share or expose it in public repositories.
Once everything is configured, click Continue to proceed to the test step.
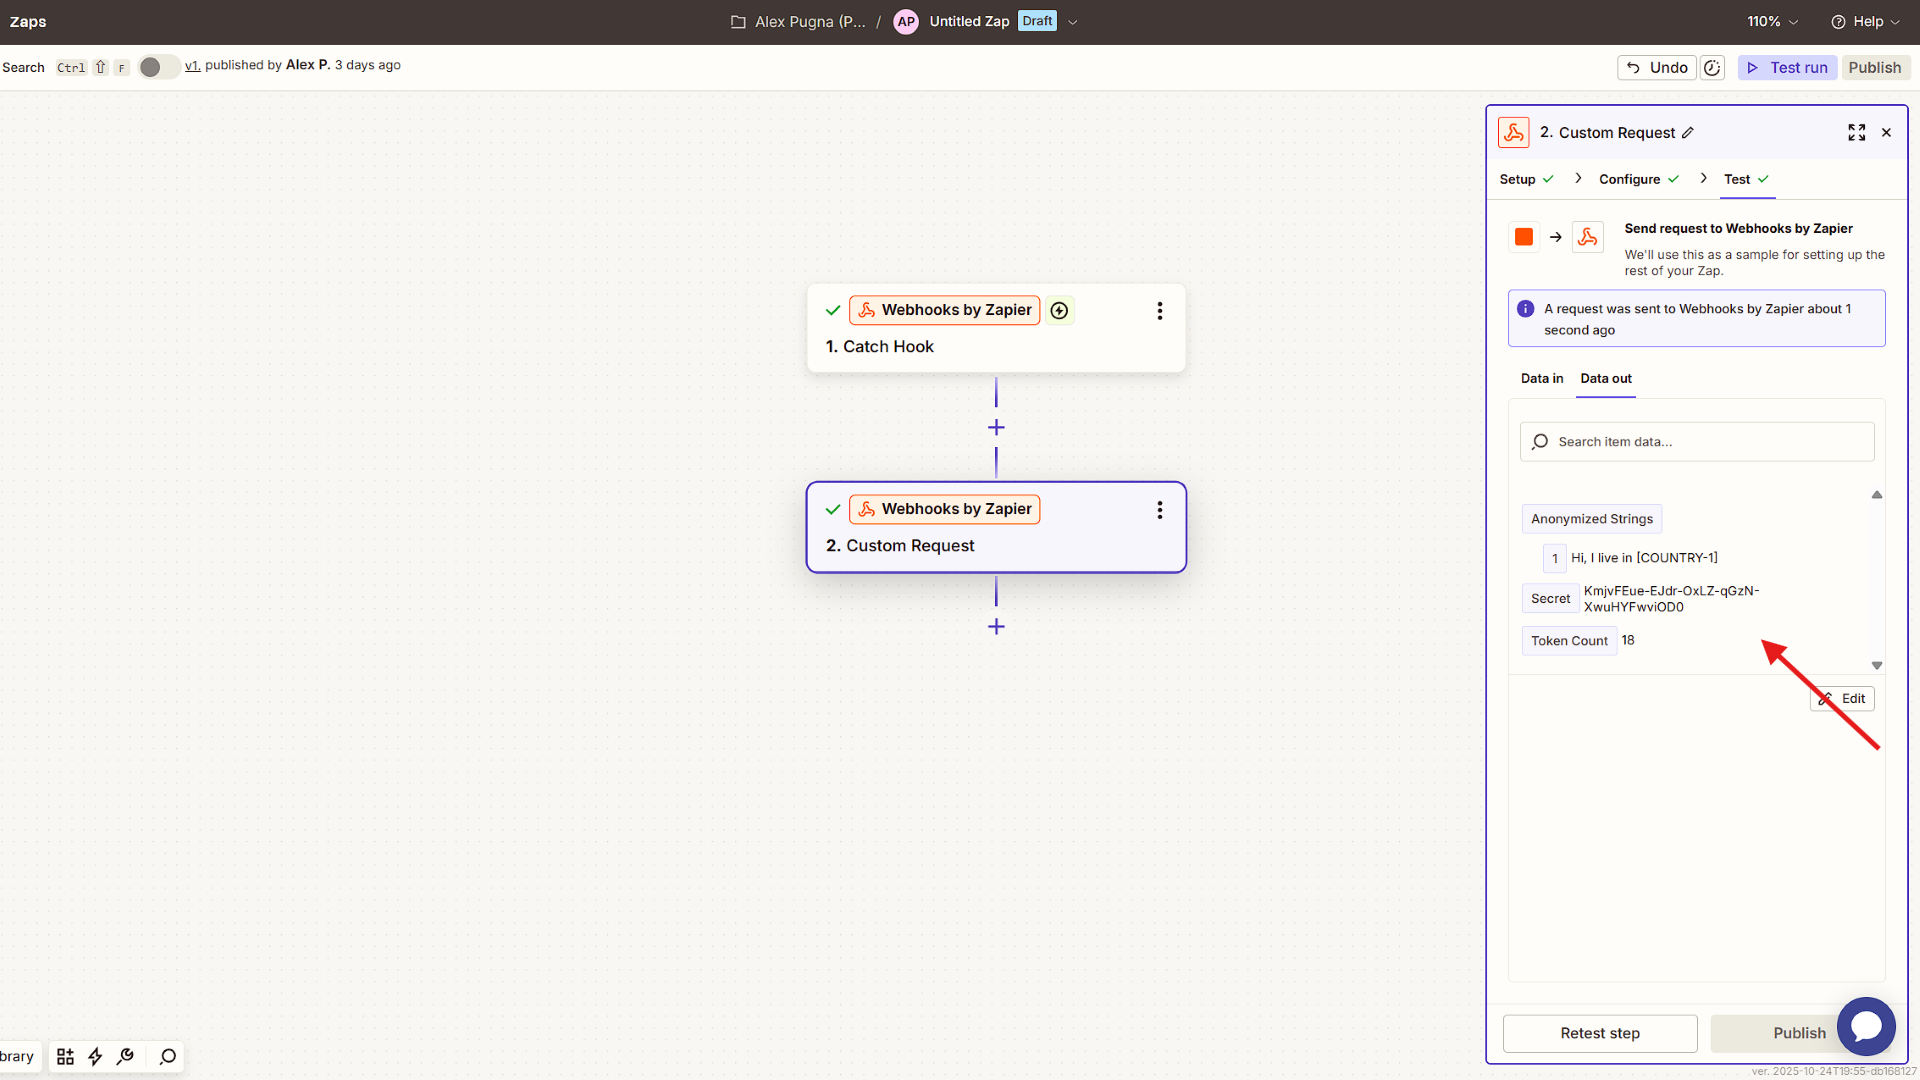
4️⃣ Execute & Verify the Request
Click Continue → Test step to send a live request to the Anonymator API.
If everything is configured correctly, Zapier will display a successful response in the Data out section.
The response includes three key fields:
- Anonymized Strings — array of anonymized text(s)
- Secret — appears only if your API key supports deanonymization
- Token Count — number of tokens processed in this request
Example output:
Code
💡 You can map the Anonymized Strings value from this step to any subsequent Zapier action or app in your workflow.