Text Deanonymization Guide
This guide walks you through how to restore anonymized text using the Anonymator API in Pabbly Connect.
You’ll learn how to configure the API module, send the deanonymization request, and verify the restored text.
1️⃣ Add the API (Pabbly) Module
In your workflow, click the “+” icon to add a new step.
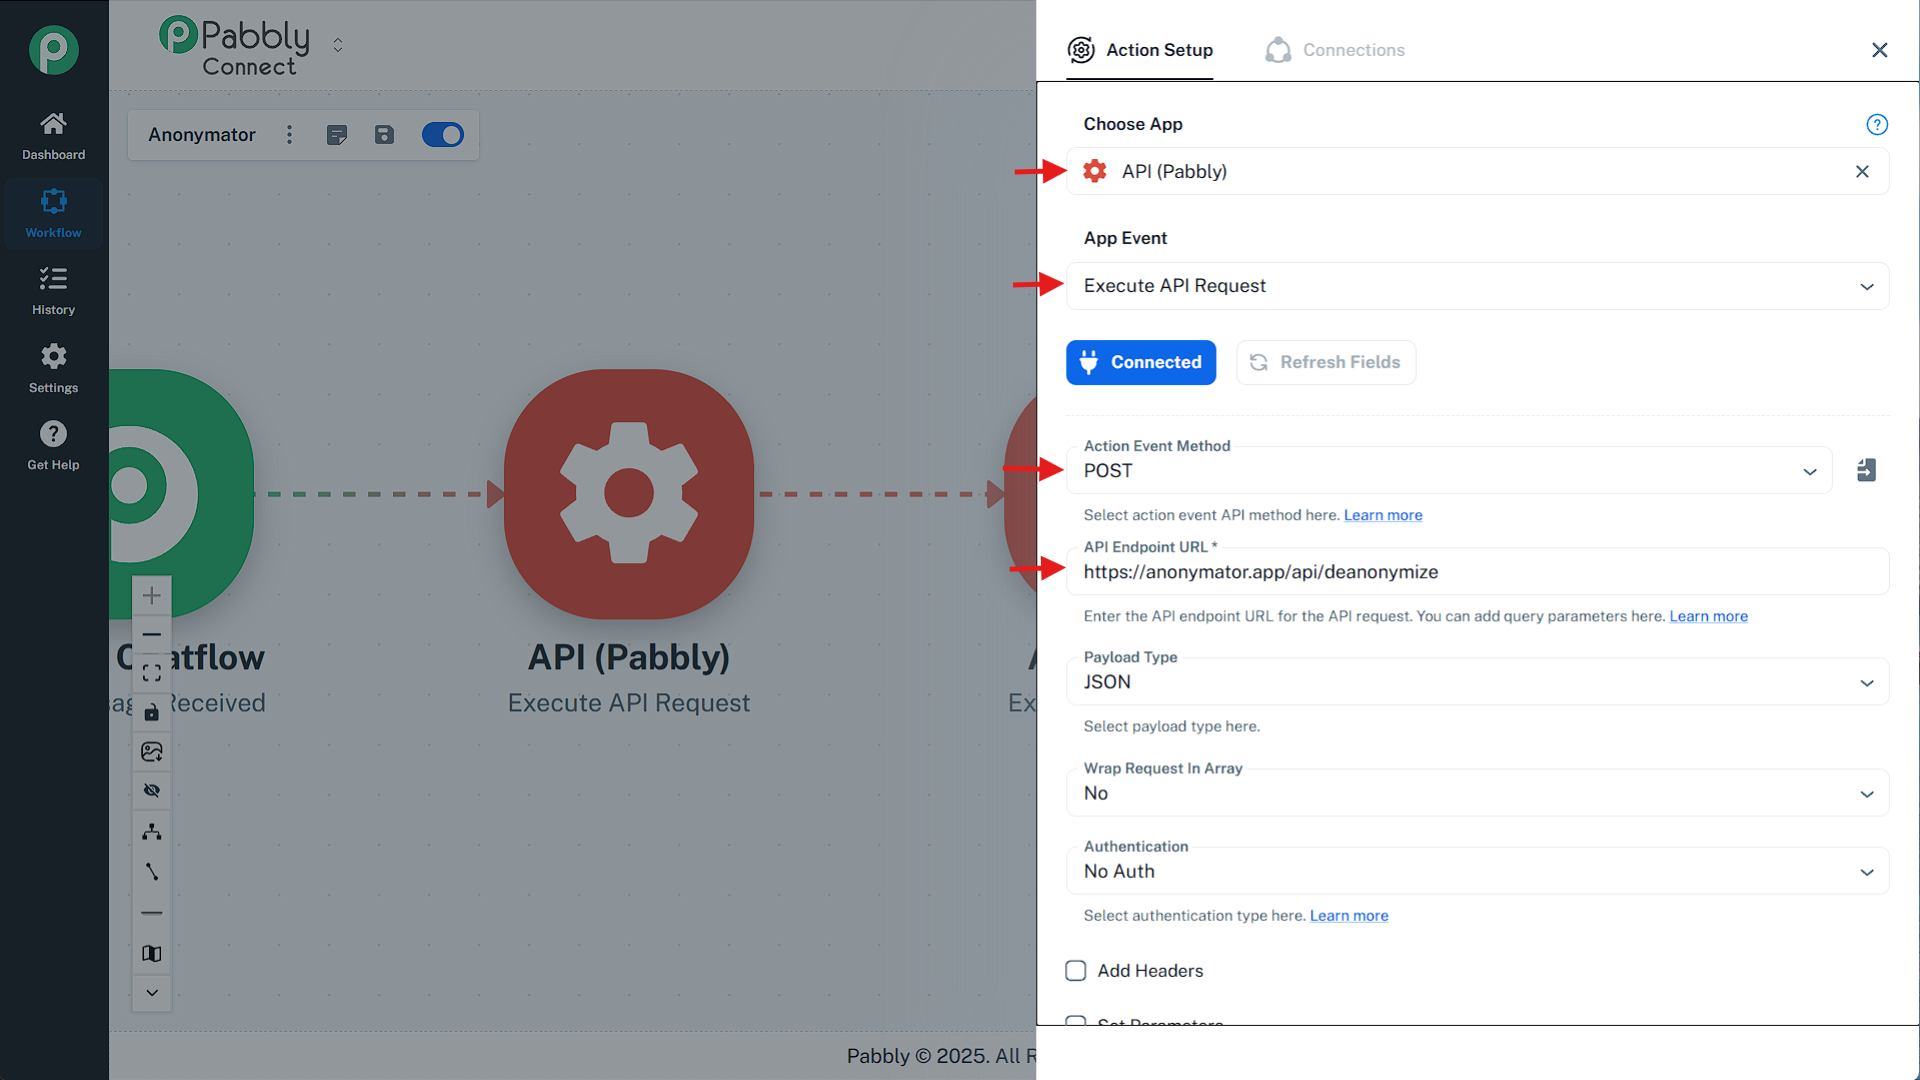
From the list of apps, search for API (Pabbly) and select it.
Then choose Execute API Request as the action event.
This module will handle the deanonymization request to the Anonymator API.
Now configure the module as follows:
- Action Event Method:
POST - API Endpoint URL:
https://anonymator.app/api/deanonymize - Payload Type:
JSON - Wrap Request in Array:
No
These options define the type of request (POST), where it’s sent, and the data format.
2️⃣ Add the Authorization Token
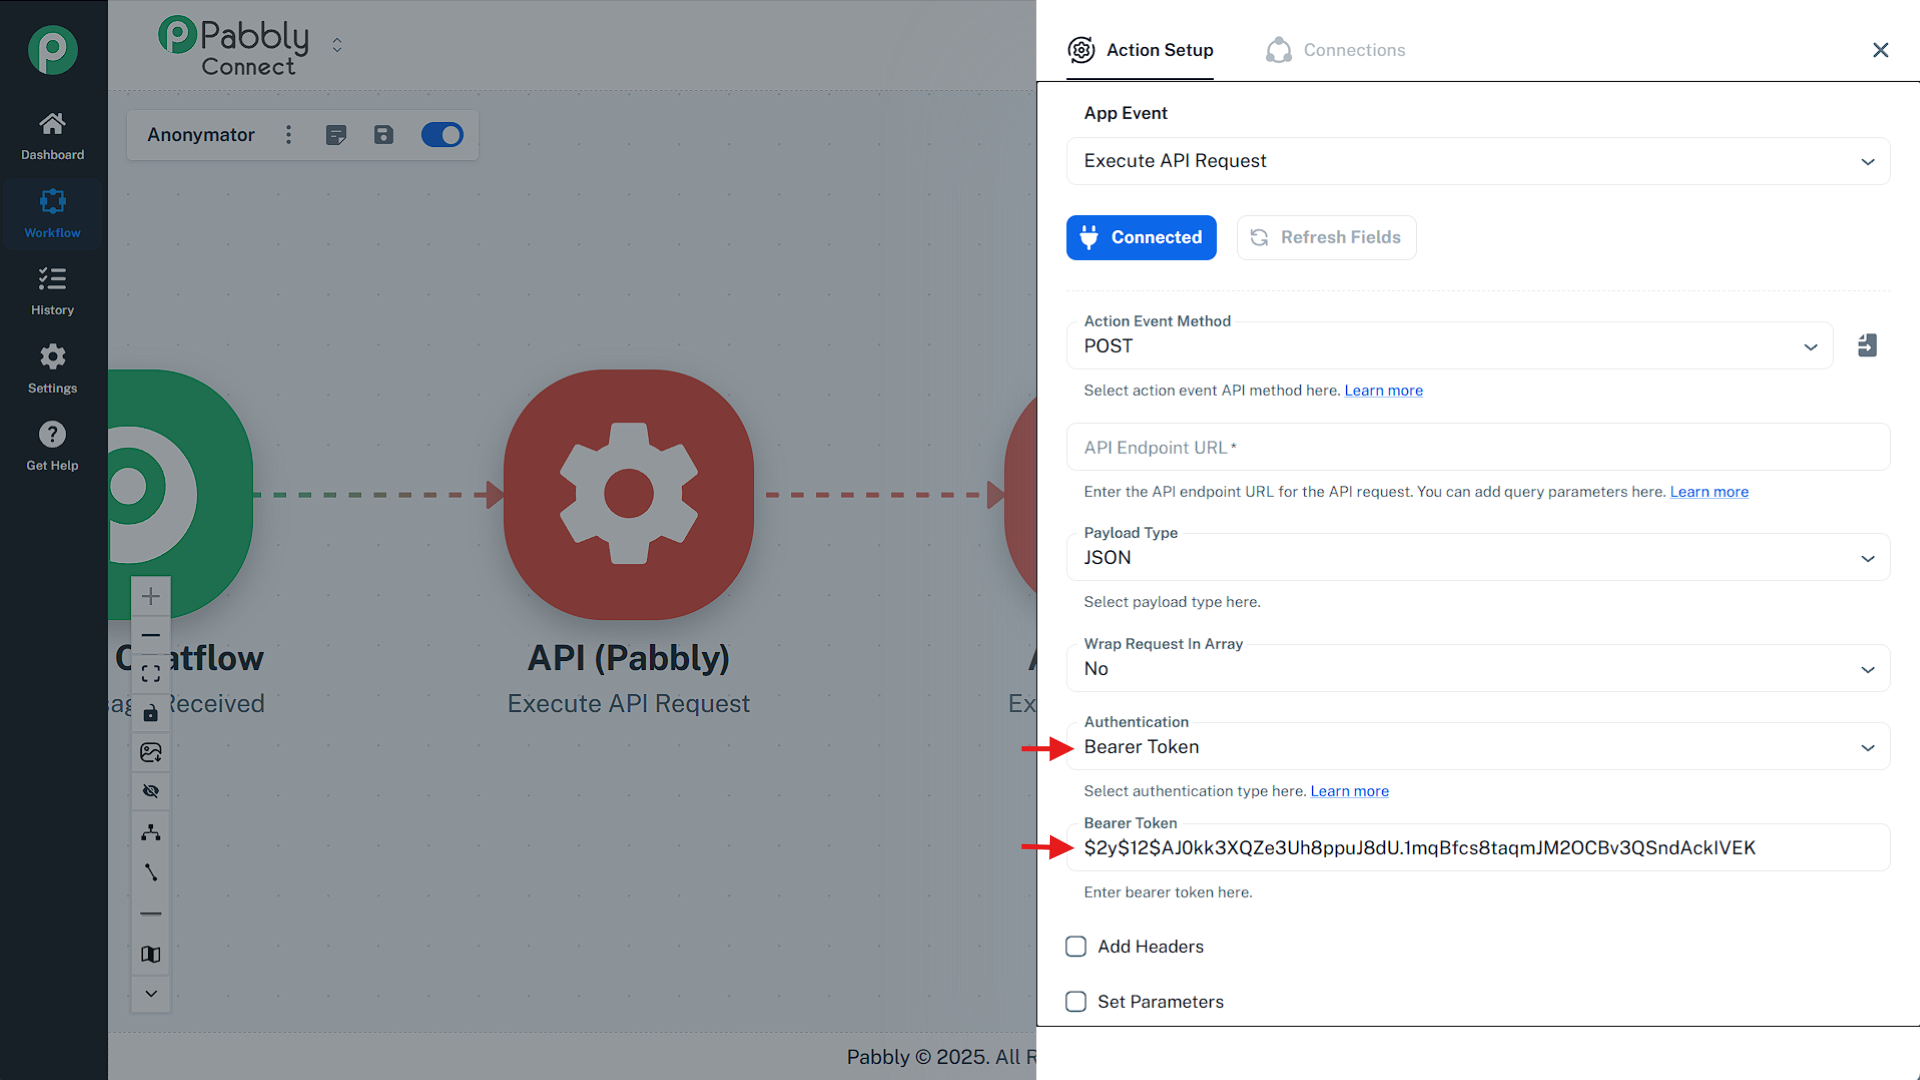
To authenticate your request, open the Authentication dropdown and choose Bearer Token.
Then paste your API key from the Anonymator Portal into the Bearer Token field.
This key verifies your request and ensures that you have permission to perform deanonymization operations.
💡 Make sure the API key you use has the Deanonymization feature enabled — otherwise, the request will be rejected.
3️⃣ Configure the Request Body
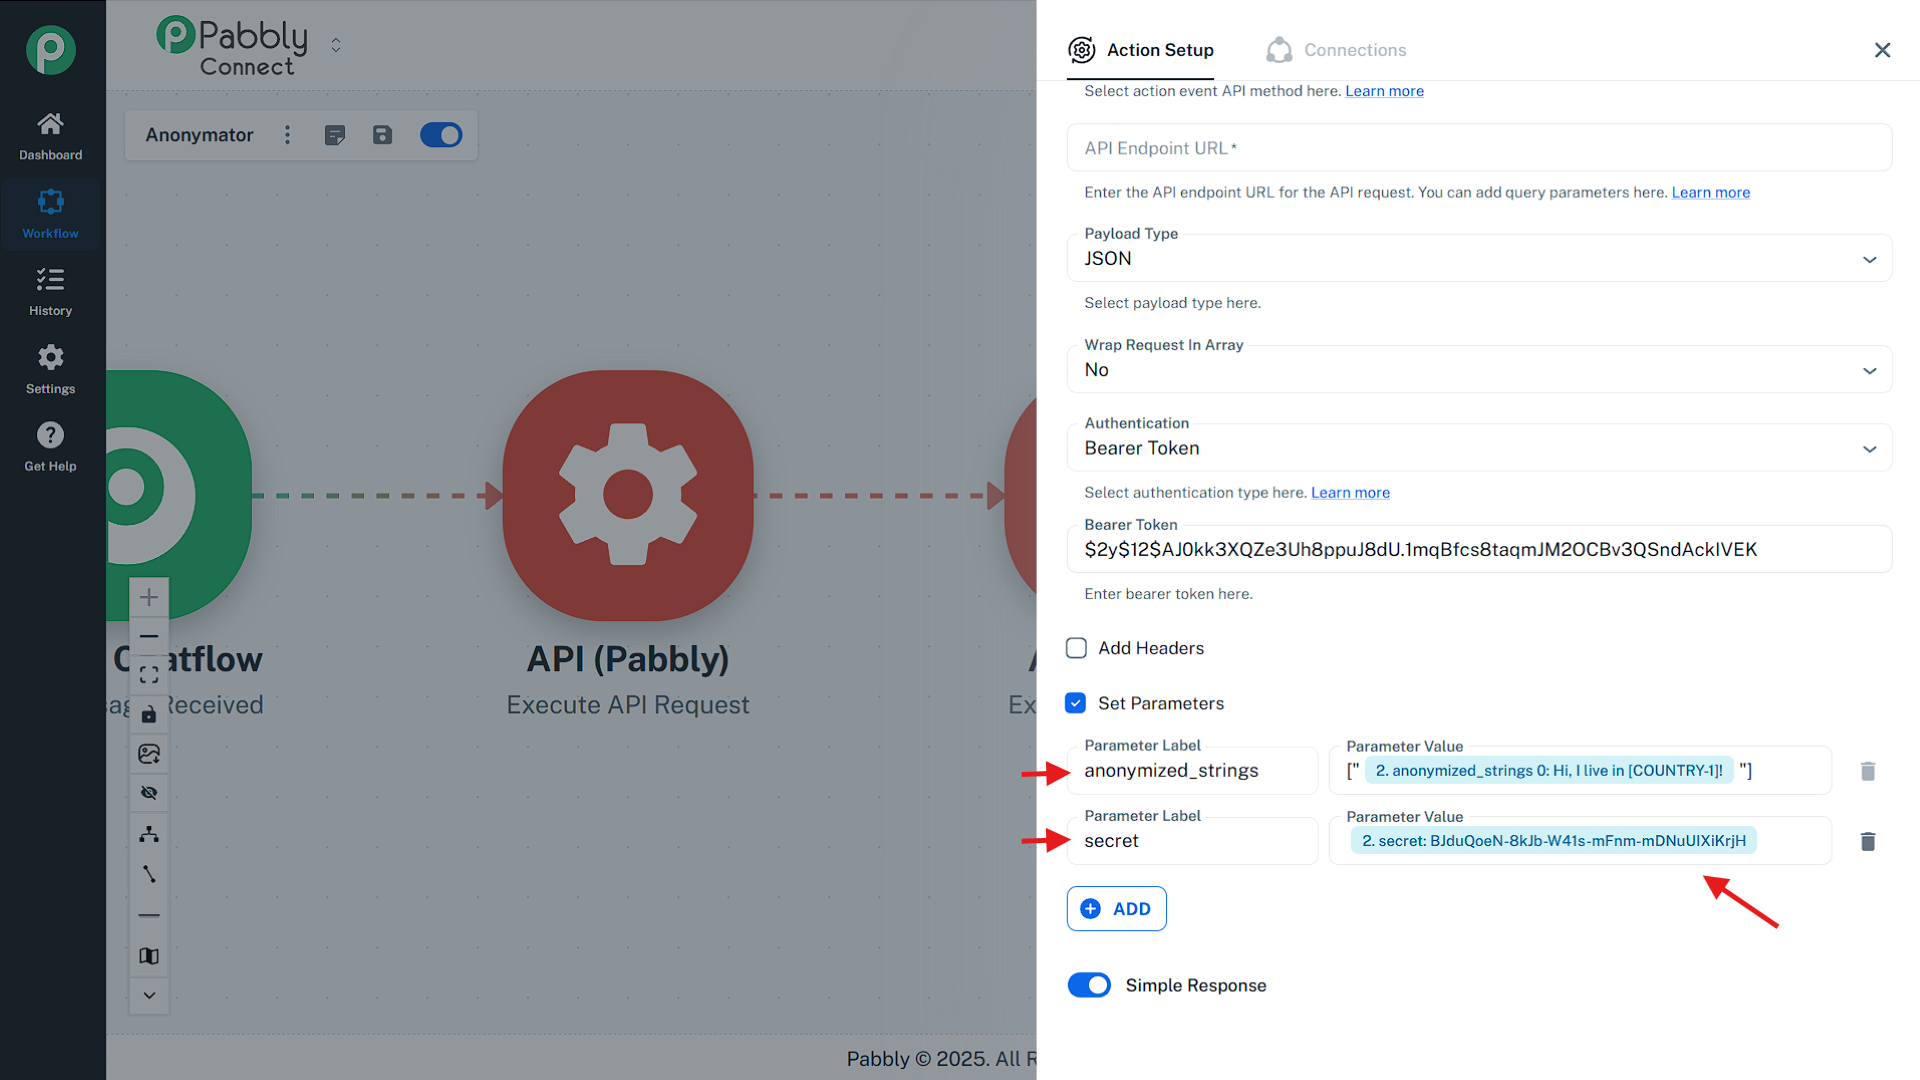
Scroll down and enable Set Parameters.
You’ll now define the data that will be sent to the Anonymator API.
Add the following two parameters:
-
Parameter Label:
anonymized_strings
Parameter Value:["{{anonymized_strings}}"]
→ Must be formatted as an array, so wrap the variable from the previous node in square brackets and quotes ([""]). -
Parameter Label:
secret
Parameter Value:{{secret}}
→ Must be of type string. This value links the anonymized text to its original form.
💡 The secret key only appears if the API key used has the Deanonymization feature enabled in the Anonymator Portal. This comes from the anonymization action.
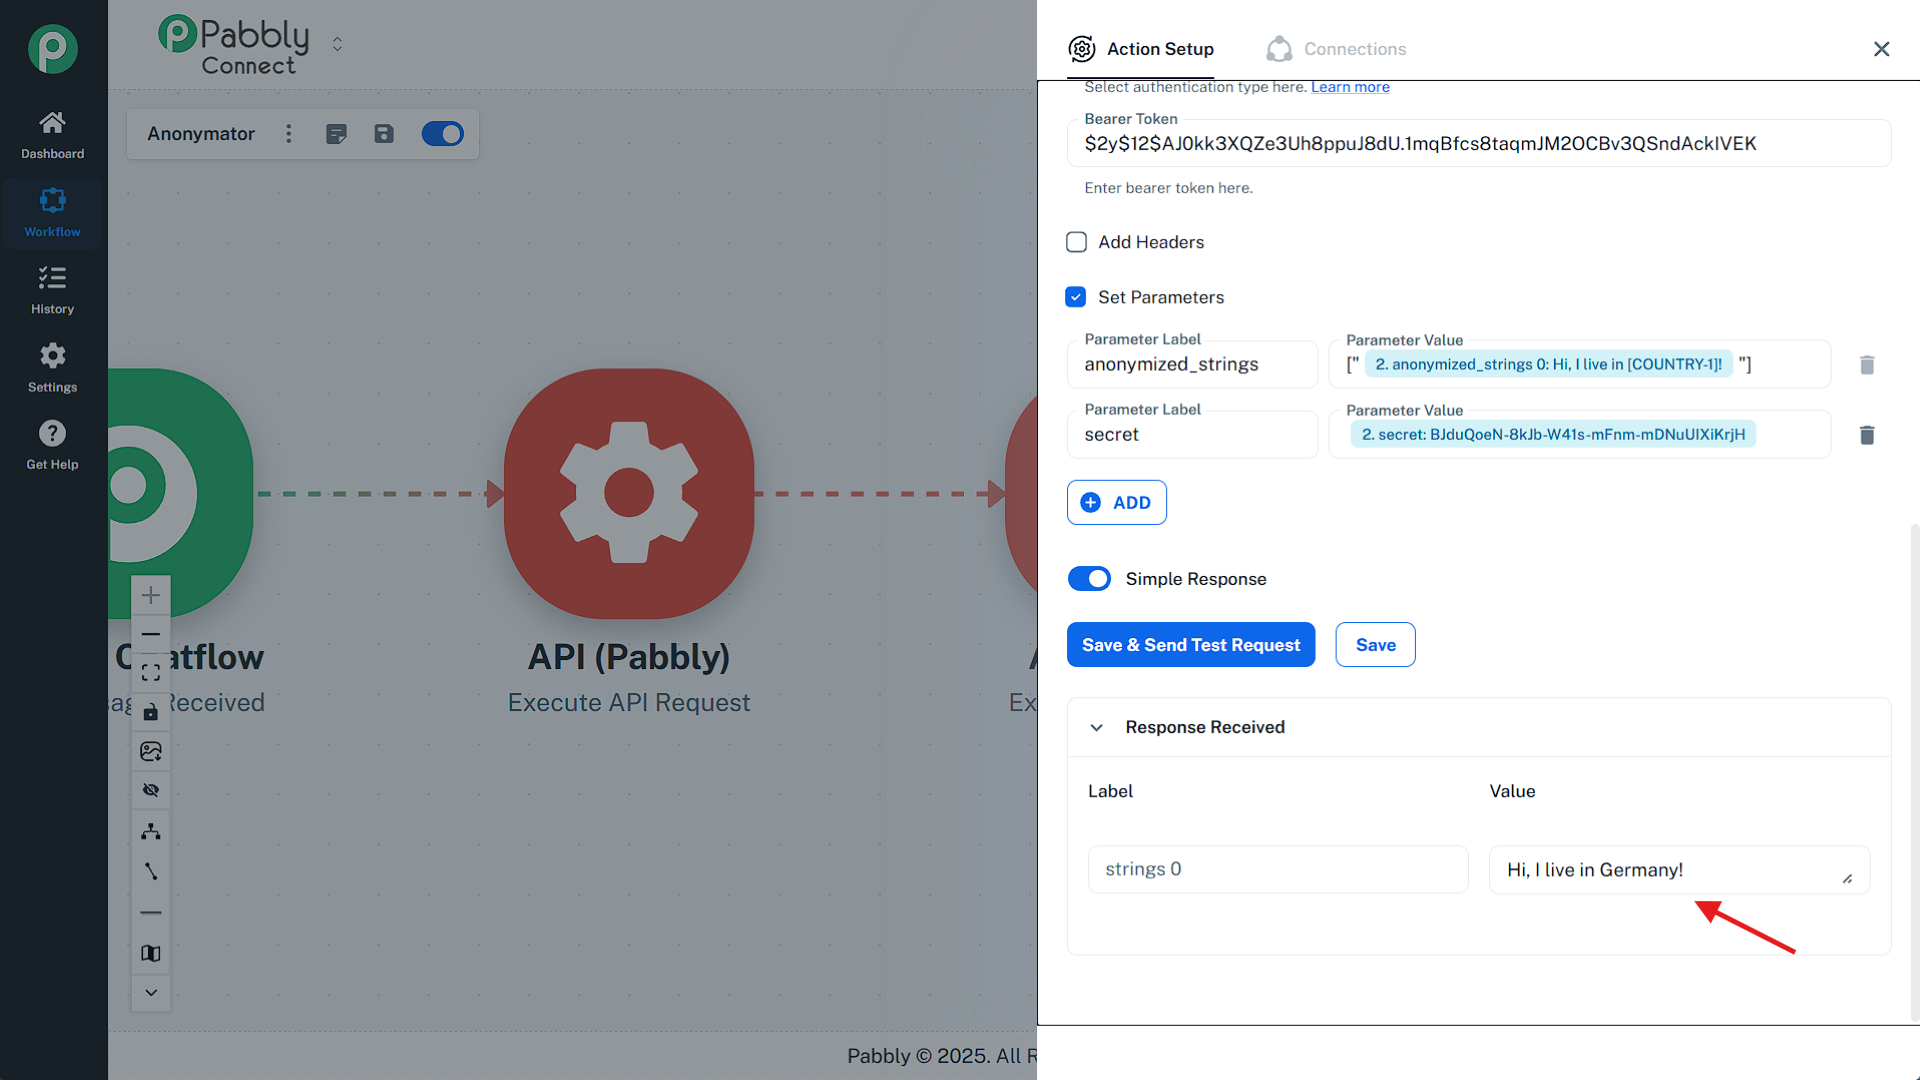
4️⃣ Execute & Verify the Result
Click Save & Send Test Request to execute the module.
If everything is configured correctly, the Anonymator API will return the restored (deanonymized) text in the response section.
You’ll find the result under:
- Response Received → strings 0
A successful response should look similar to:
Code
This confirms that the anonymized text has been successfully deanonymized.