Text Deanonymization Guide
Audience: first-time users configuring a Zapier workflow to restore anonymized text via the Anonymator API.
1️⃣ Overview
This guide walks you through how to configure a Zapier workflow using the Webhooks by Zapier app to send a POST request to the Anonymator API for text deanonymization.
You’ll learn how to:
- Add the Webhooks module
- Choose the correct action event
- Configure the Custom Request node
- Set up authentication
- Define the JSON request body
- Execute and verify the deanonymized output
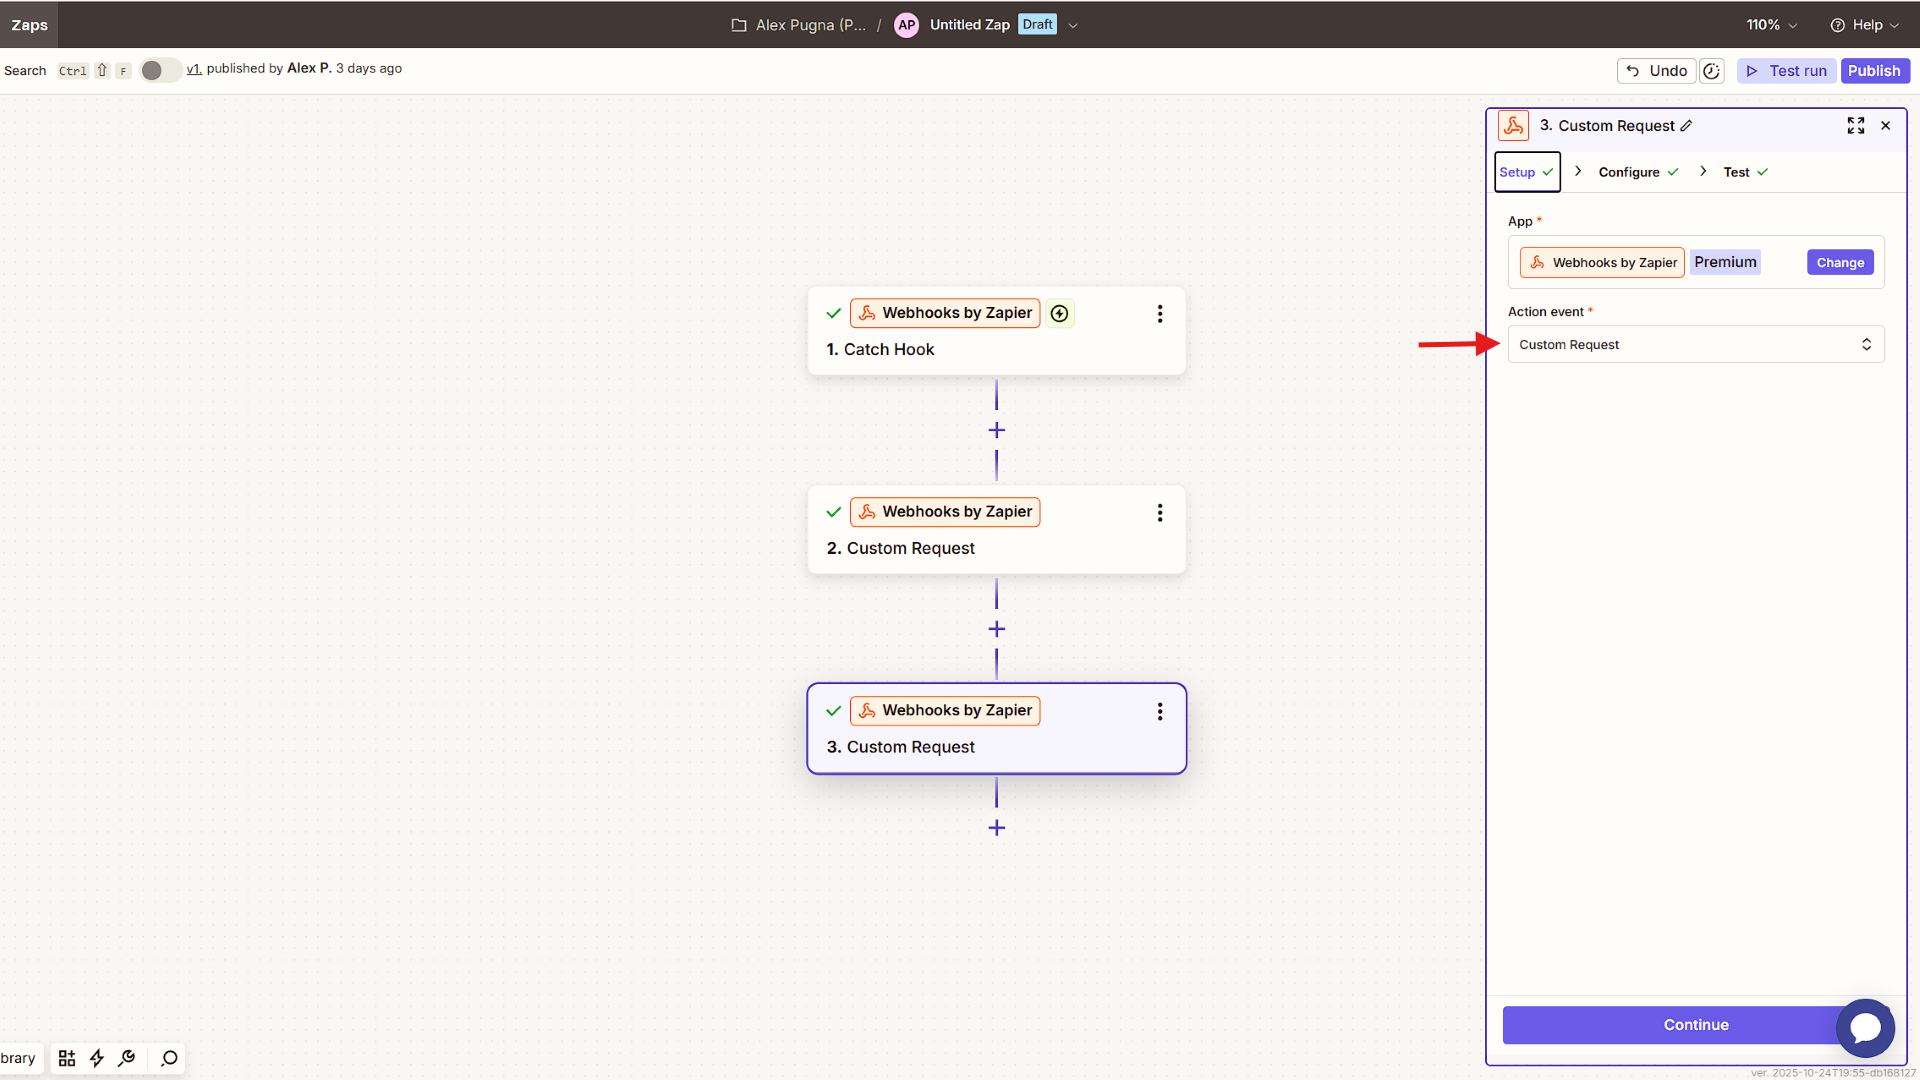
2️⃣ Add the Webhooks Module
In your Zapier workflow, add a new step and select Webhooks by Zapier as the app.
Then, under Action Event, choose Custom Request — this allows you to send a fully customized HTTP POST request to the Anonymator API for restoring anonymized text.
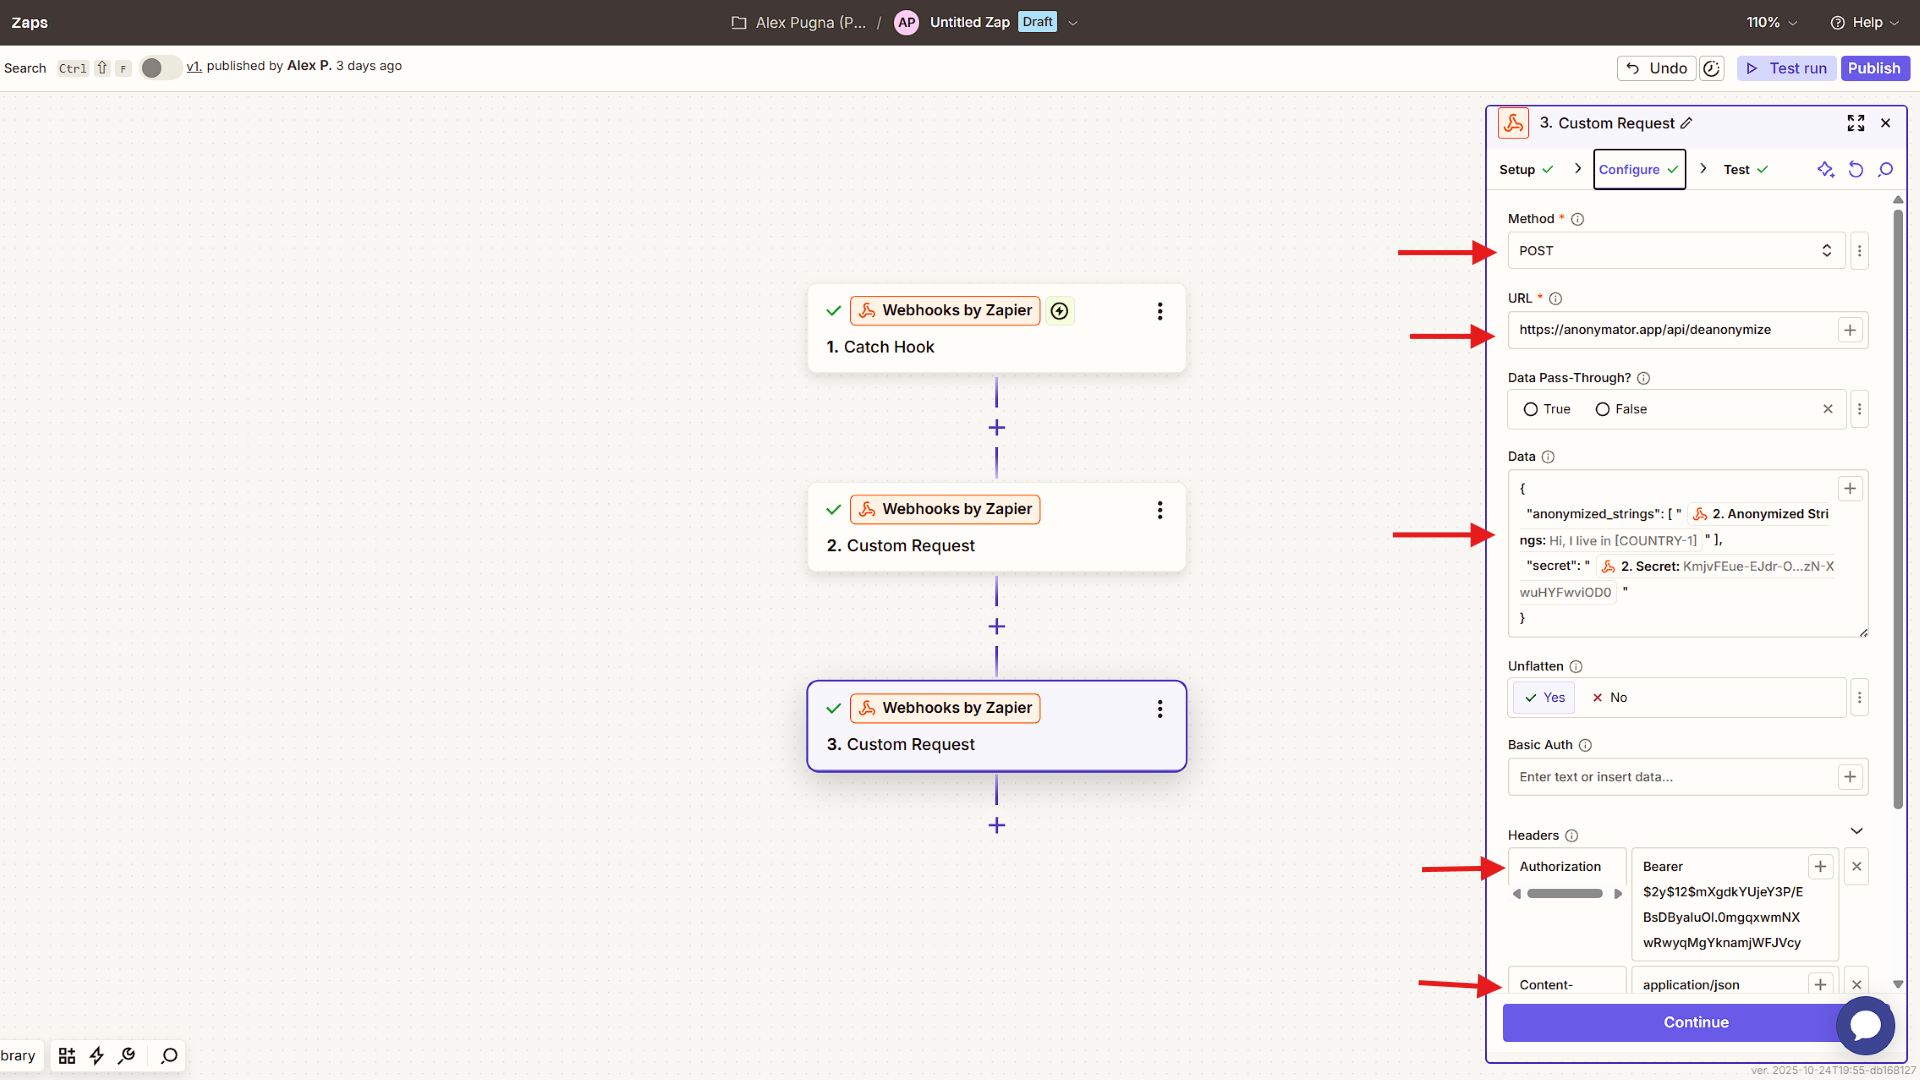
3️⃣ Configure the Custom Request
Set up the Webhooks by Zapier → Custom Request action as shown below.
Method
POST
URL
https://anonymator.app/api/deanonymize
Data Pass-Through
False
Data (Body)
Paste the JSON below and map your variables from the previous node:
Code
🔹 anonymized_strings must be formatted as an array, even when containing a single text element.
🔹 secret must be a string.
Both values can be mapped from the output of the previous node containing the anonymized data.
The secret field only appears if the deanonymization feature is enabled for your API key in the Anonymator Portal.
Headers
- Authorization:
Bearer $2y$12$… - Content-Type:
application/json
Once everything is configured, click Continue to move on to the test step.
4️⃣ Execute & Verify the Request
Click Continue → Test step to send a live request to the Anonymator API.
If everything is configured correctly, Zapier will display a successful response in the Data out section.
The response includes one main field:
- Strings — array containing the restored, deanonymized text(s)
Example output:
Code
💡 You can map the Strings value from this step into any subsequent Zapier action or app in your workflow.
