Text Deanonymization Guide
This guide explains how to restore anonymized text using the Anonymator API in n8n.
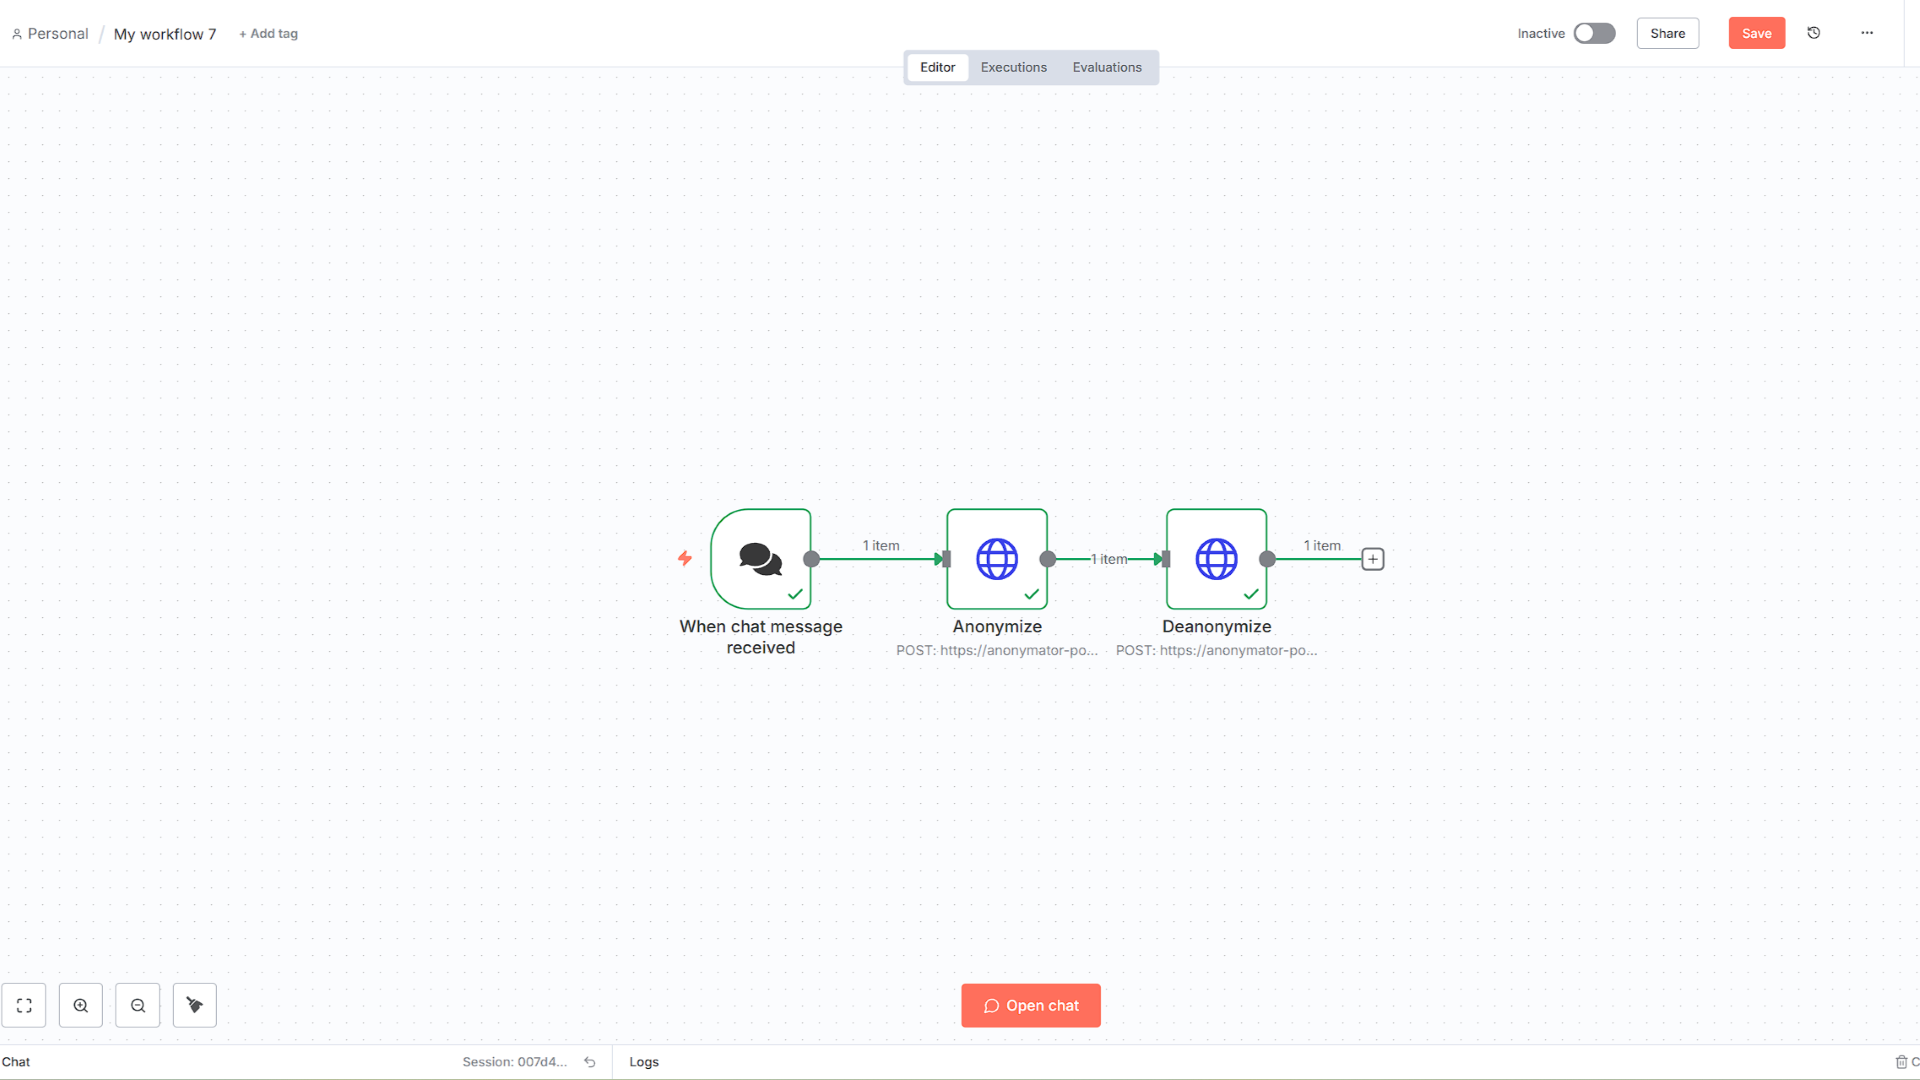
1️⃣ Add the HTTP Request Node
From the nodes panel, drag HTTP Request into your workflow canvas.
Click the node to open its configuration options.
Optionally rename it to Deanonymize for clarity.
2️⃣ Connect the Deanonymize Node
Connect the newly added HTTP Request node to the part of your workflow that outputs the anonymized string and its corresponding secret.
These two values will be used in the request body to restore the original text.
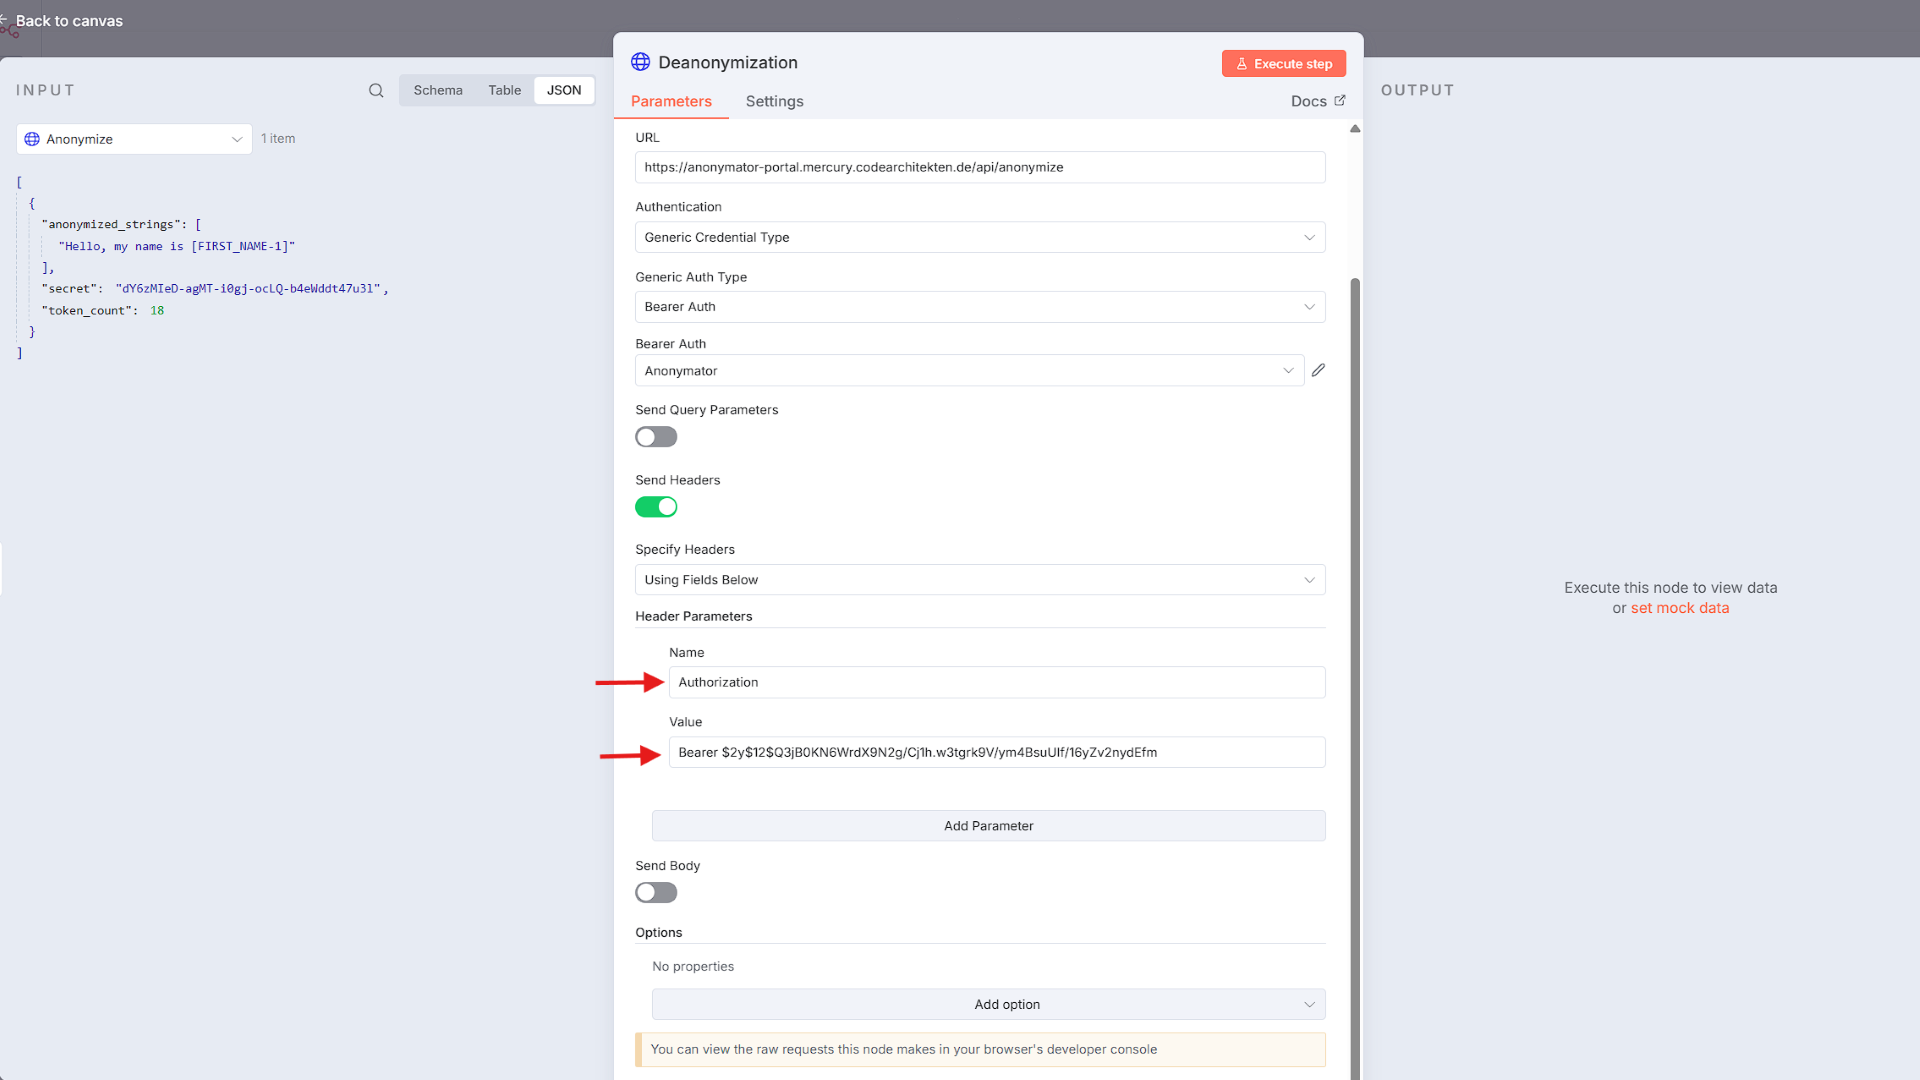
3️⃣ Configure the Endpoint URL and Method
Set the following parameters in your Deanonymize node:
- HTTP Method:
POST - URL:
https://anonymator.app/api/deanonymize - Authentication Method:
Generic Credential Type - Generic Auth Type:
Bearer Auth
Once selected, choose your existing Bearer credential or create a new one if needed.
Using the same Bearer token as in the Anonymization process is recommended to maintain consistent permissions between both endpoints.
⚠️ Important: Make sure the API key used in your Bearer token has the Deanonymization feature enabled in the Anonymator Portal.
Without this permission, the deanonymization request will not succeed.Enabling the Deanonymization feature also updates the Anonymization endpoint’s response structure by adding a
"secret"field.
This"secret"value must be included later in your deanonymization request body to correctly restore the anonymized text.🔁 If you need to change or update your Bearer token, follow the same process described in the Text Anonymization Guide.
.png)
4️⃣ Configure the Authorization Header
Toggle the Send Headers option to ON.
Under Specify Headers, choose Using Fields Below.
In the Header Parameters section:
- Name:
Authorization - Value:
Bearer <YOUR_API_KEY>
This header authenticates your request using the Bearer token generated in the Anonymator Portal.
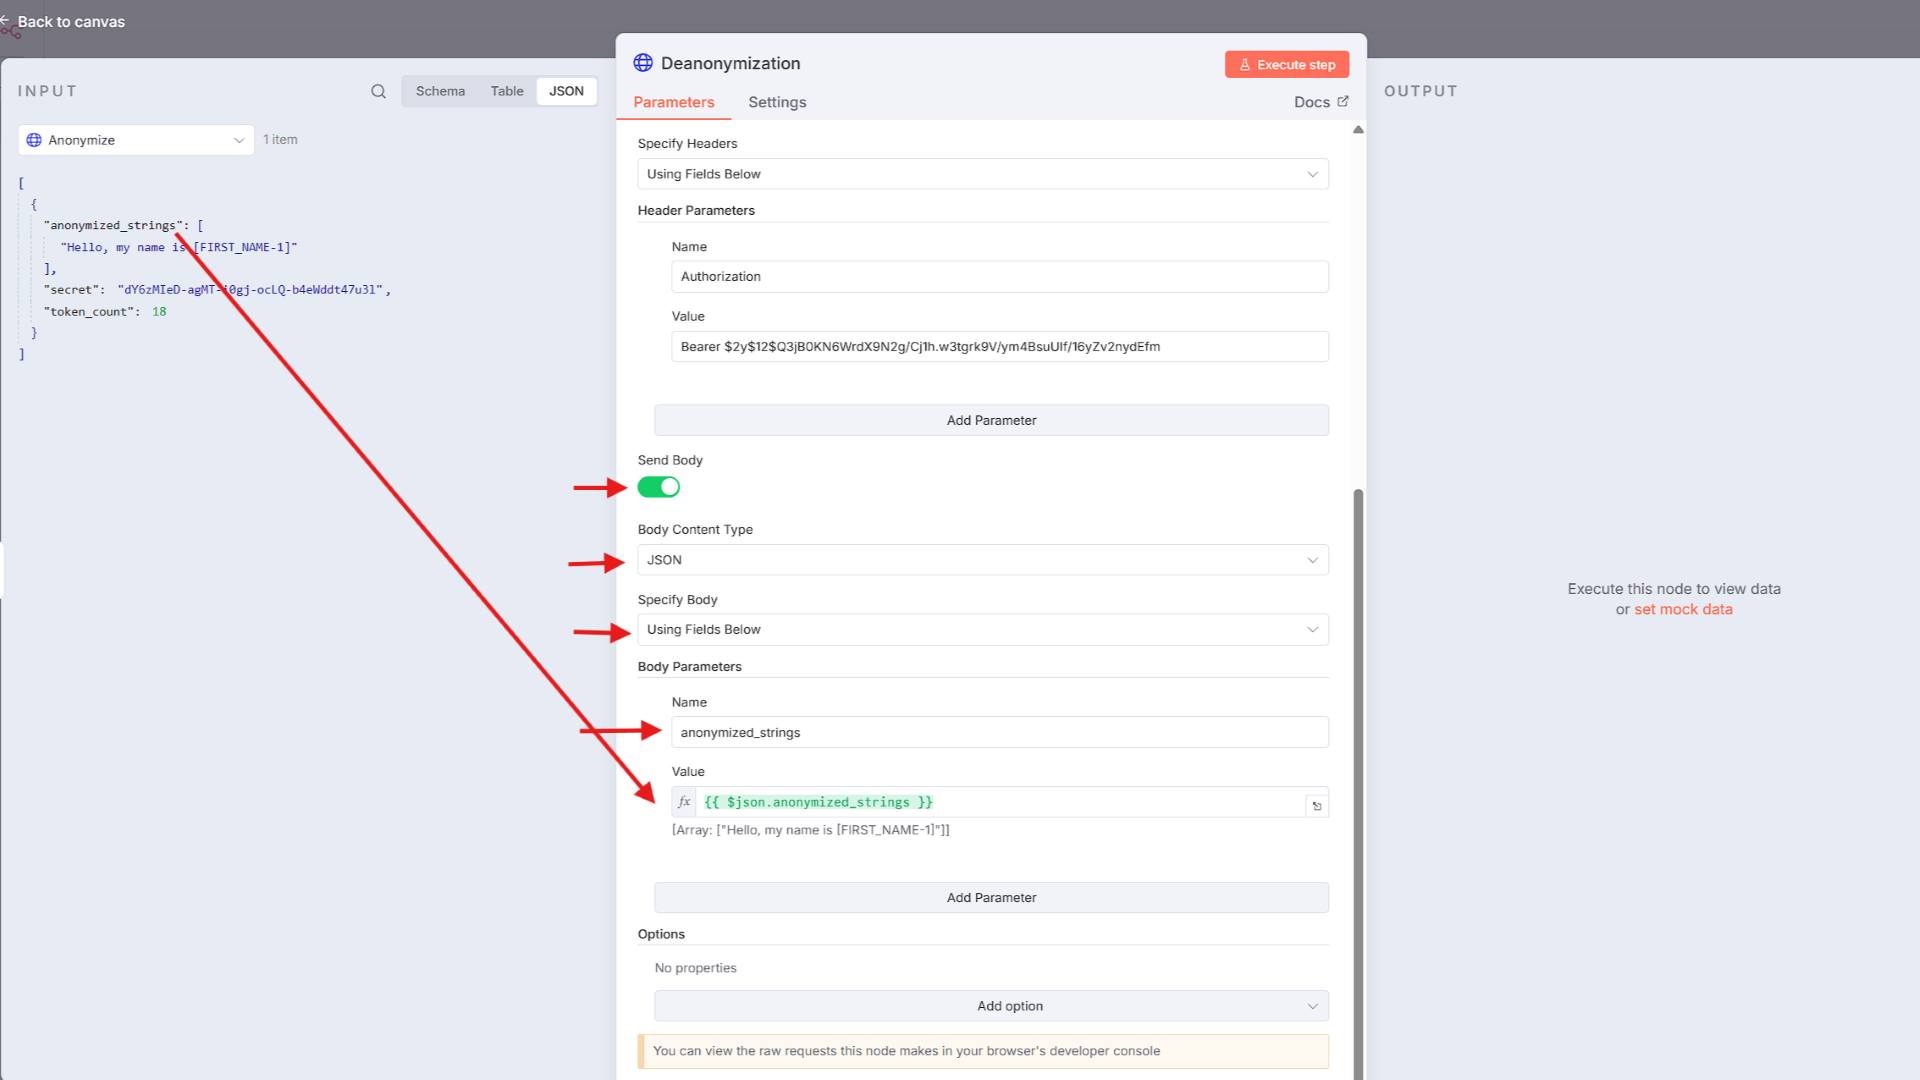
5️⃣ Configure the Request Body
Scroll down to the Body Parameters section.
Enable and configure the following fields before adding any parameters:
- Toggle Send Body →
ON - Set Body Content Type →
JSON - Set Specify Body →
Using Fields Below
Part 1 — Add the Anonymized Strings Parameter
Now add the first Body Parameter:
- Name: use the key that matches the field containing your anonymized text (for example,
anonymized_strings). - Value: drag the variable from the input node (the Anonymize node) into this field — e.g.
{{ $json.anonymized_strings }}.
💡 This step links the deanonymization process to the anonymized content generated earlier, ensuring the API receives the correct data to restore.
Part 2 — Add the Secret Parameter
Click Add Parameter to create a second entry under Body Parameters.
- Name:
secret - Value: drag the
secretvariable from the Anonymize node input into this field — e.g.{{ $json.secret }}.
⚠️ Important: The
secretvalue is automatically generated when the Deanonymization feature is enabled in the Anonymator Portal.
It appears in the Anonymization response and is required for the deanonymization process to function correctly.
Without this field, the API cannot match the anonymized data with its original values.🔁 If you need to change or update the API key used for this operation, follow the same procedure outlined in the Text Anonymization Guide (Steps 4–5).
.png)
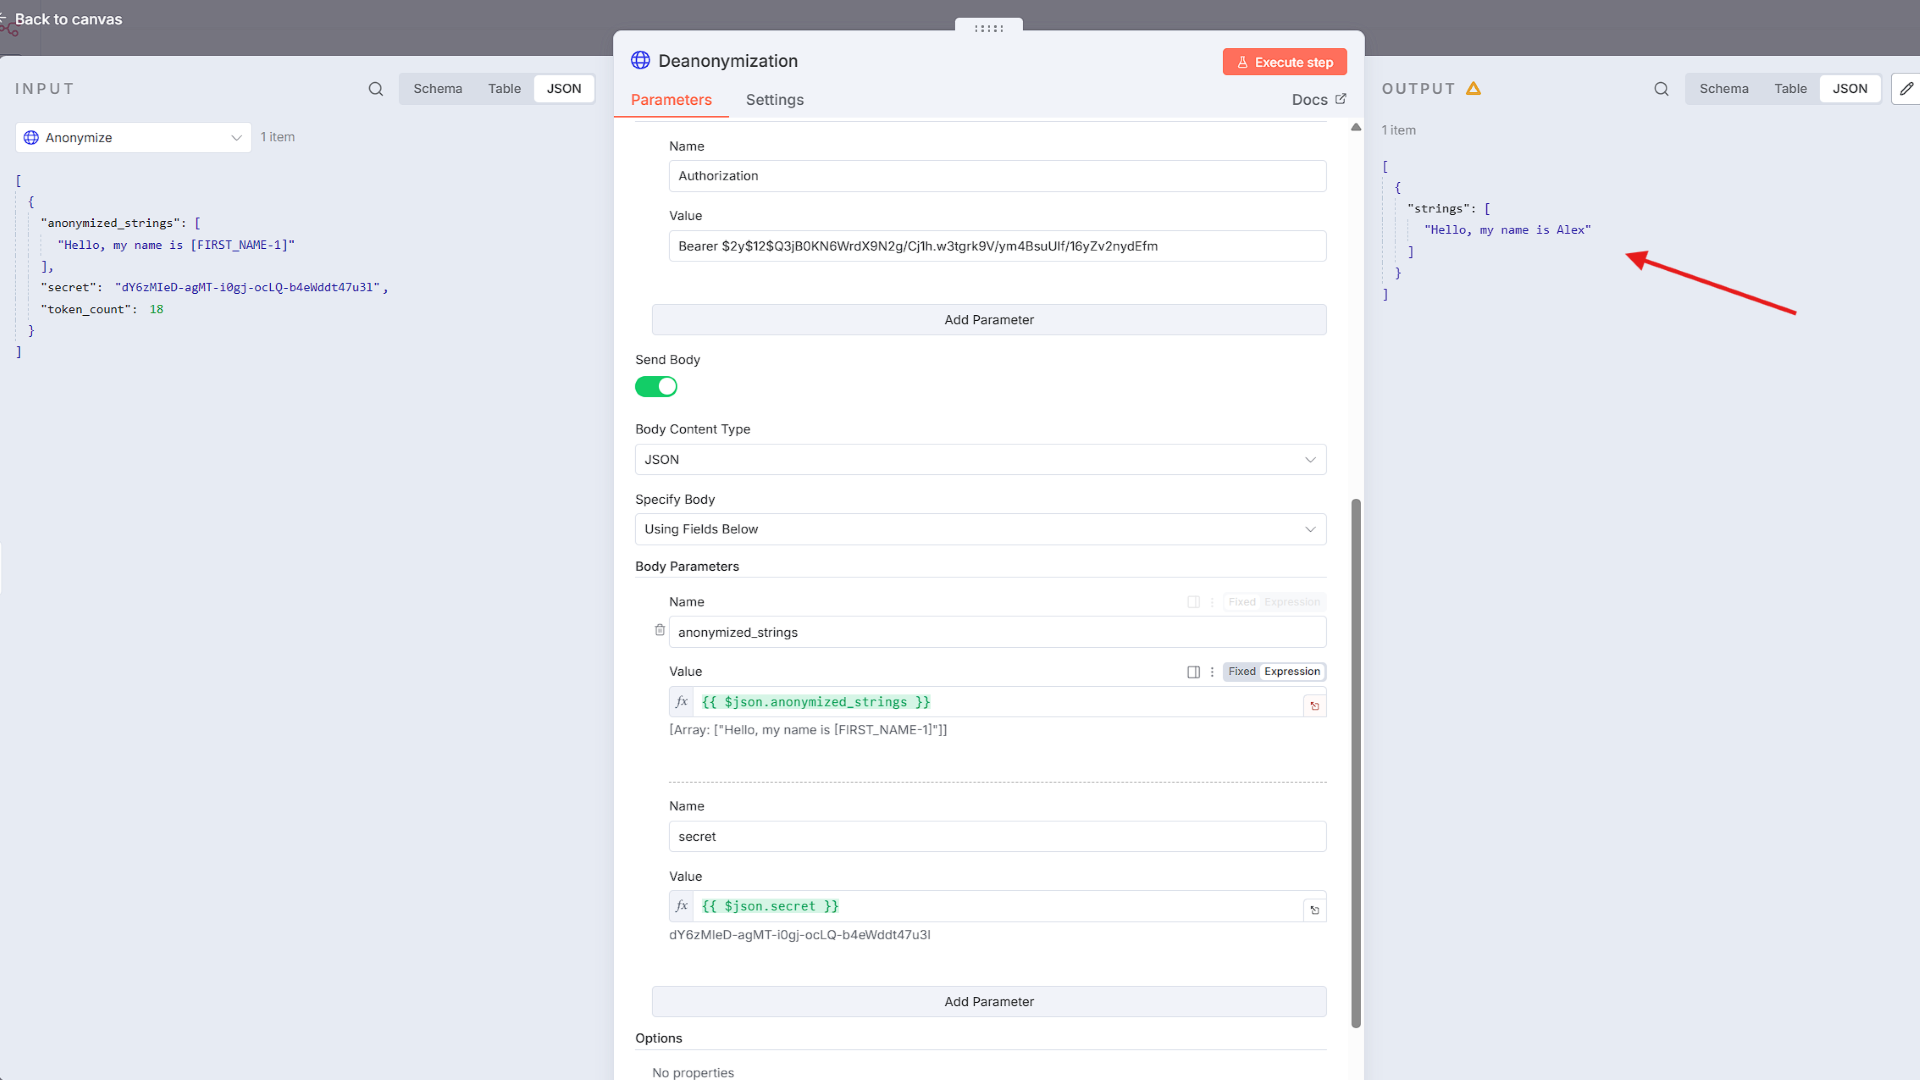
6️⃣ Execute & Verify the Result
Click Execute Node to run the deanonymization request.
If everything is configured correctly, the node’s Output section will display the restored text.
A successful response should look similar to:
Code