Text anonymization Guide
Audience: first-time users configuring the HTTP Request Node to call the Anonymator API.
1️⃣ Overview
This guide walks you through how to configure the HTTP Request Node in n8n to send a POST request to the Anonymator API.
You’ll learn how to:
- Add the HTTP Request Node to the canvas
- Set the endpoint URL
- Configure authentication
- Create and save a Bearer credential
- Define the JSON request body
- Execute the request and verify results
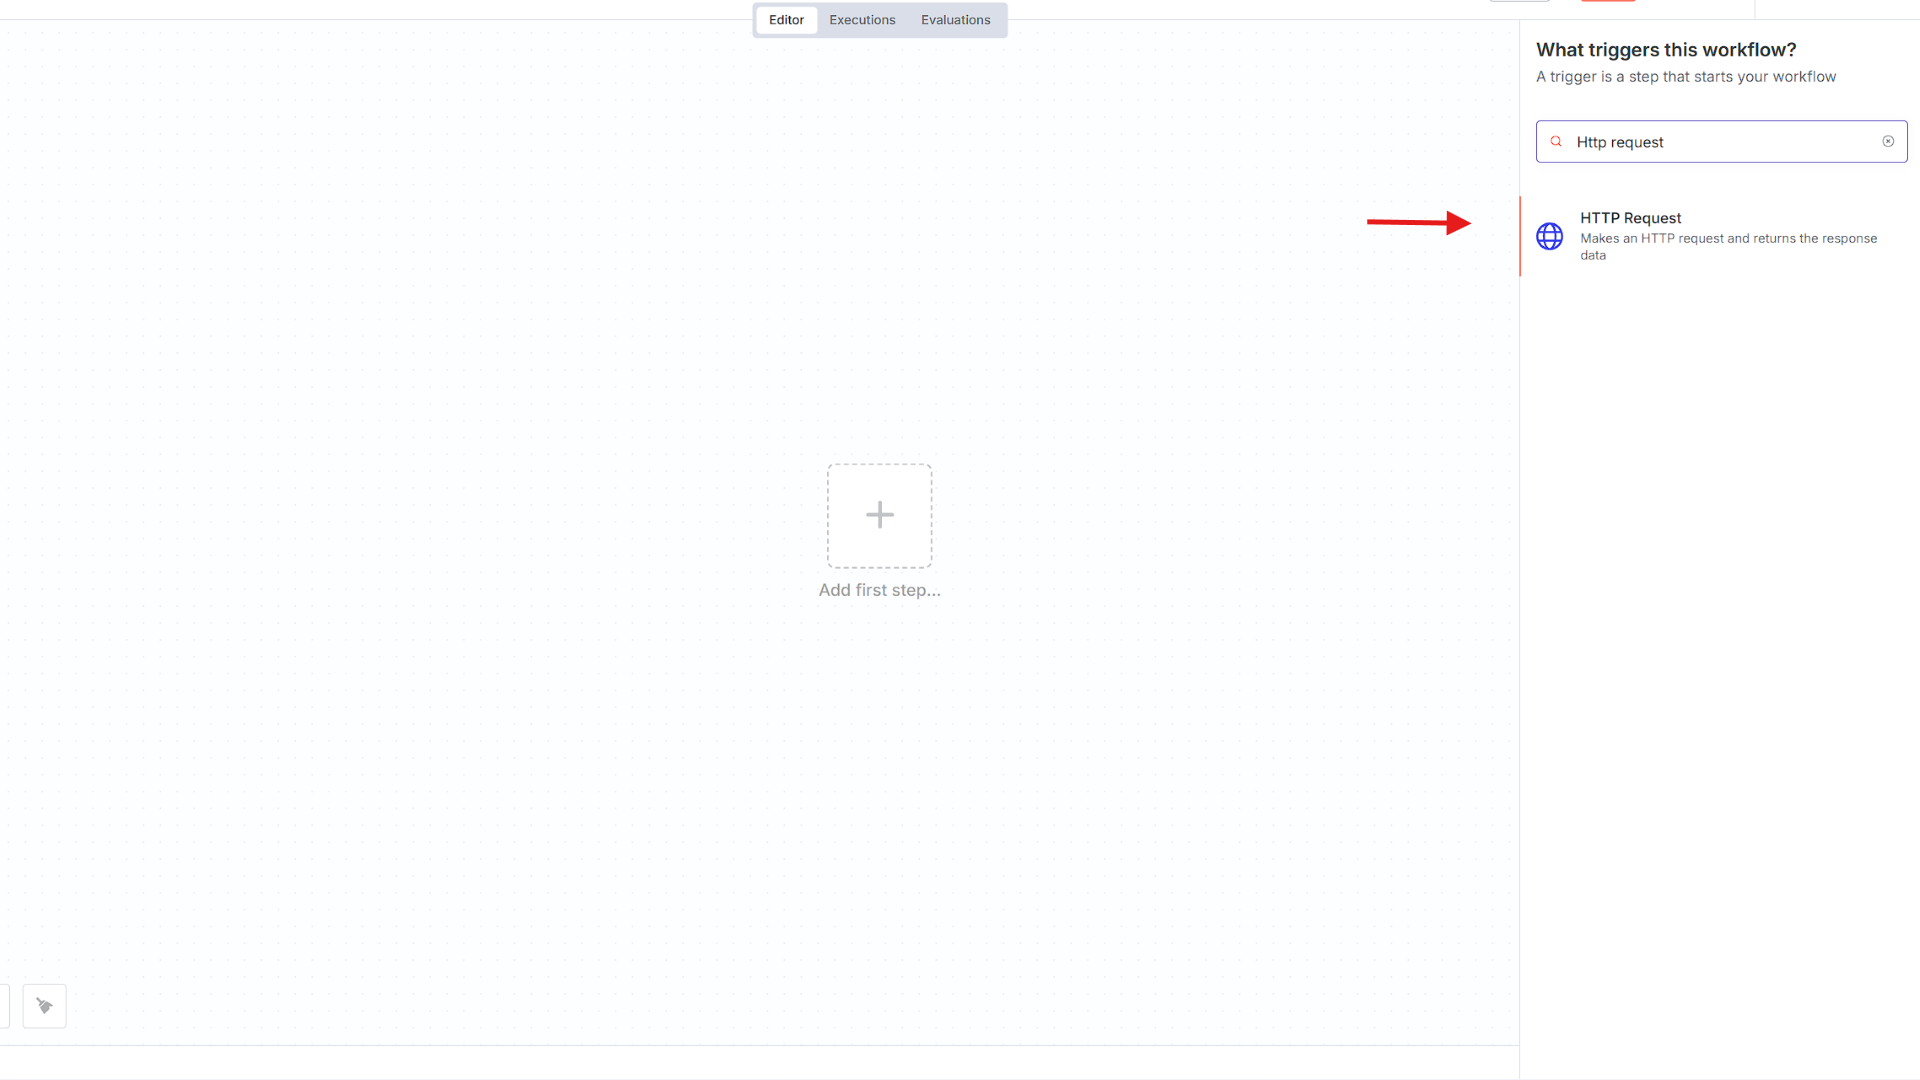
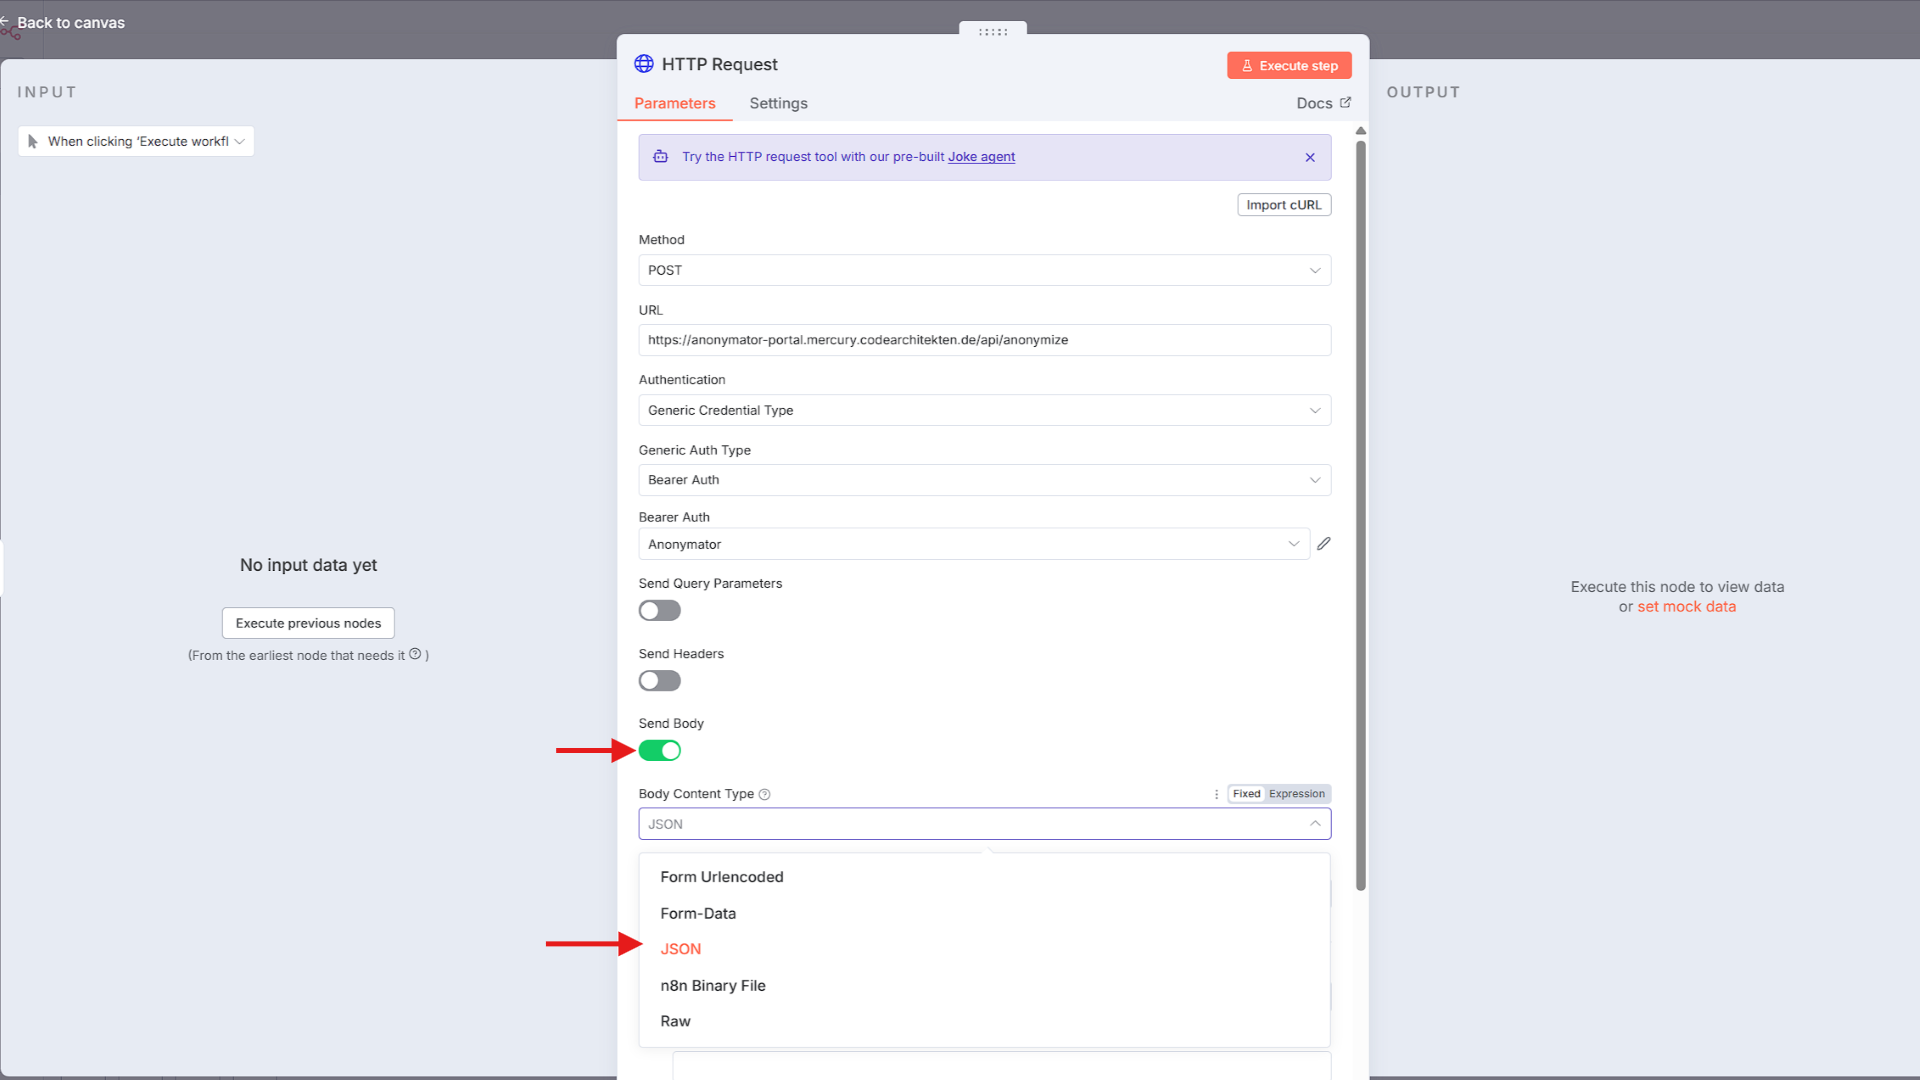
2️⃣ Add the HTTP Request Node
From the nodes panel, drag HTTP Request into your workflow canvas.
Click the node to open its configuration options.
3️⃣ Configure the Endpoint URL and Method
Set:
- HTTP Method:
POST - URL:https://anonymator.app/api/anonymize
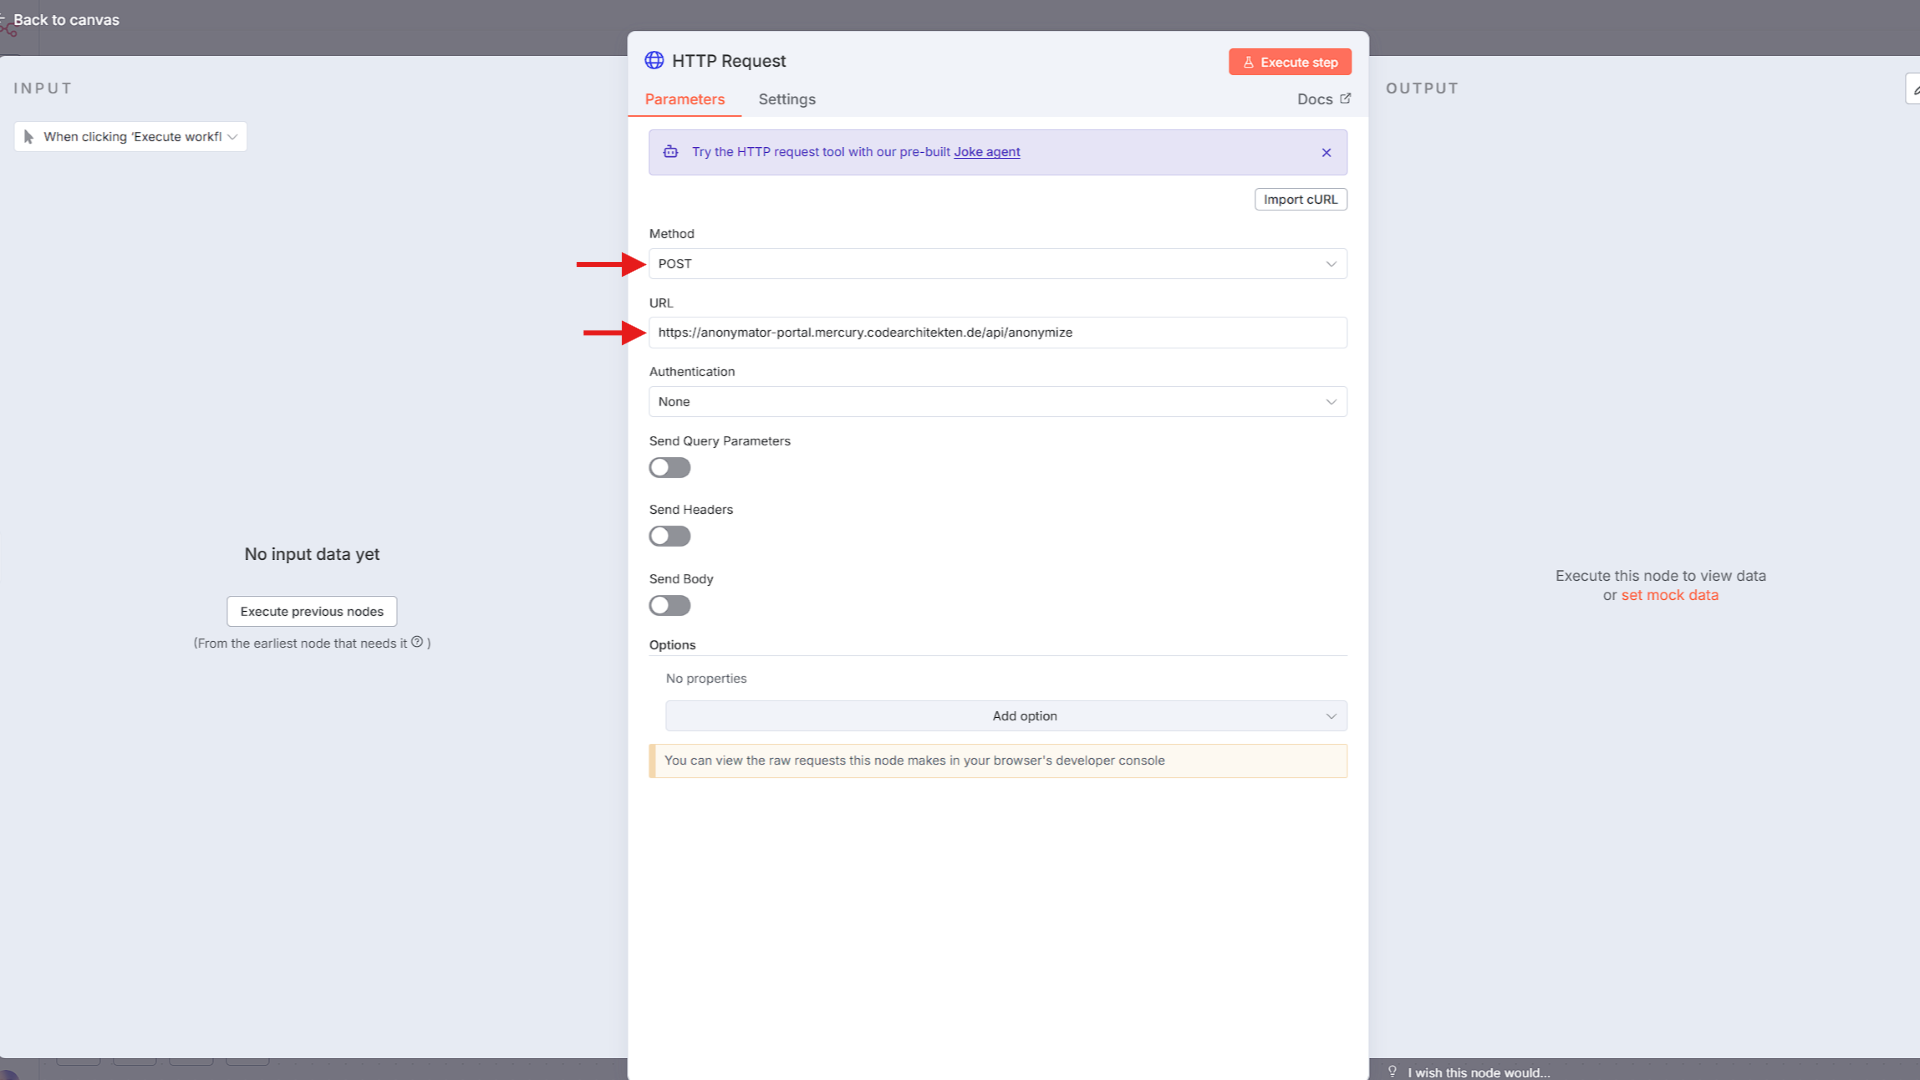
4️⃣ Choose the Authentication Method
Under Authentication, choose:
- Authentication Method:
Generic Credential Type - Generic Auth Type:
Bearer Auth
Then click + Create new credential to generate a new Bearer token credential.
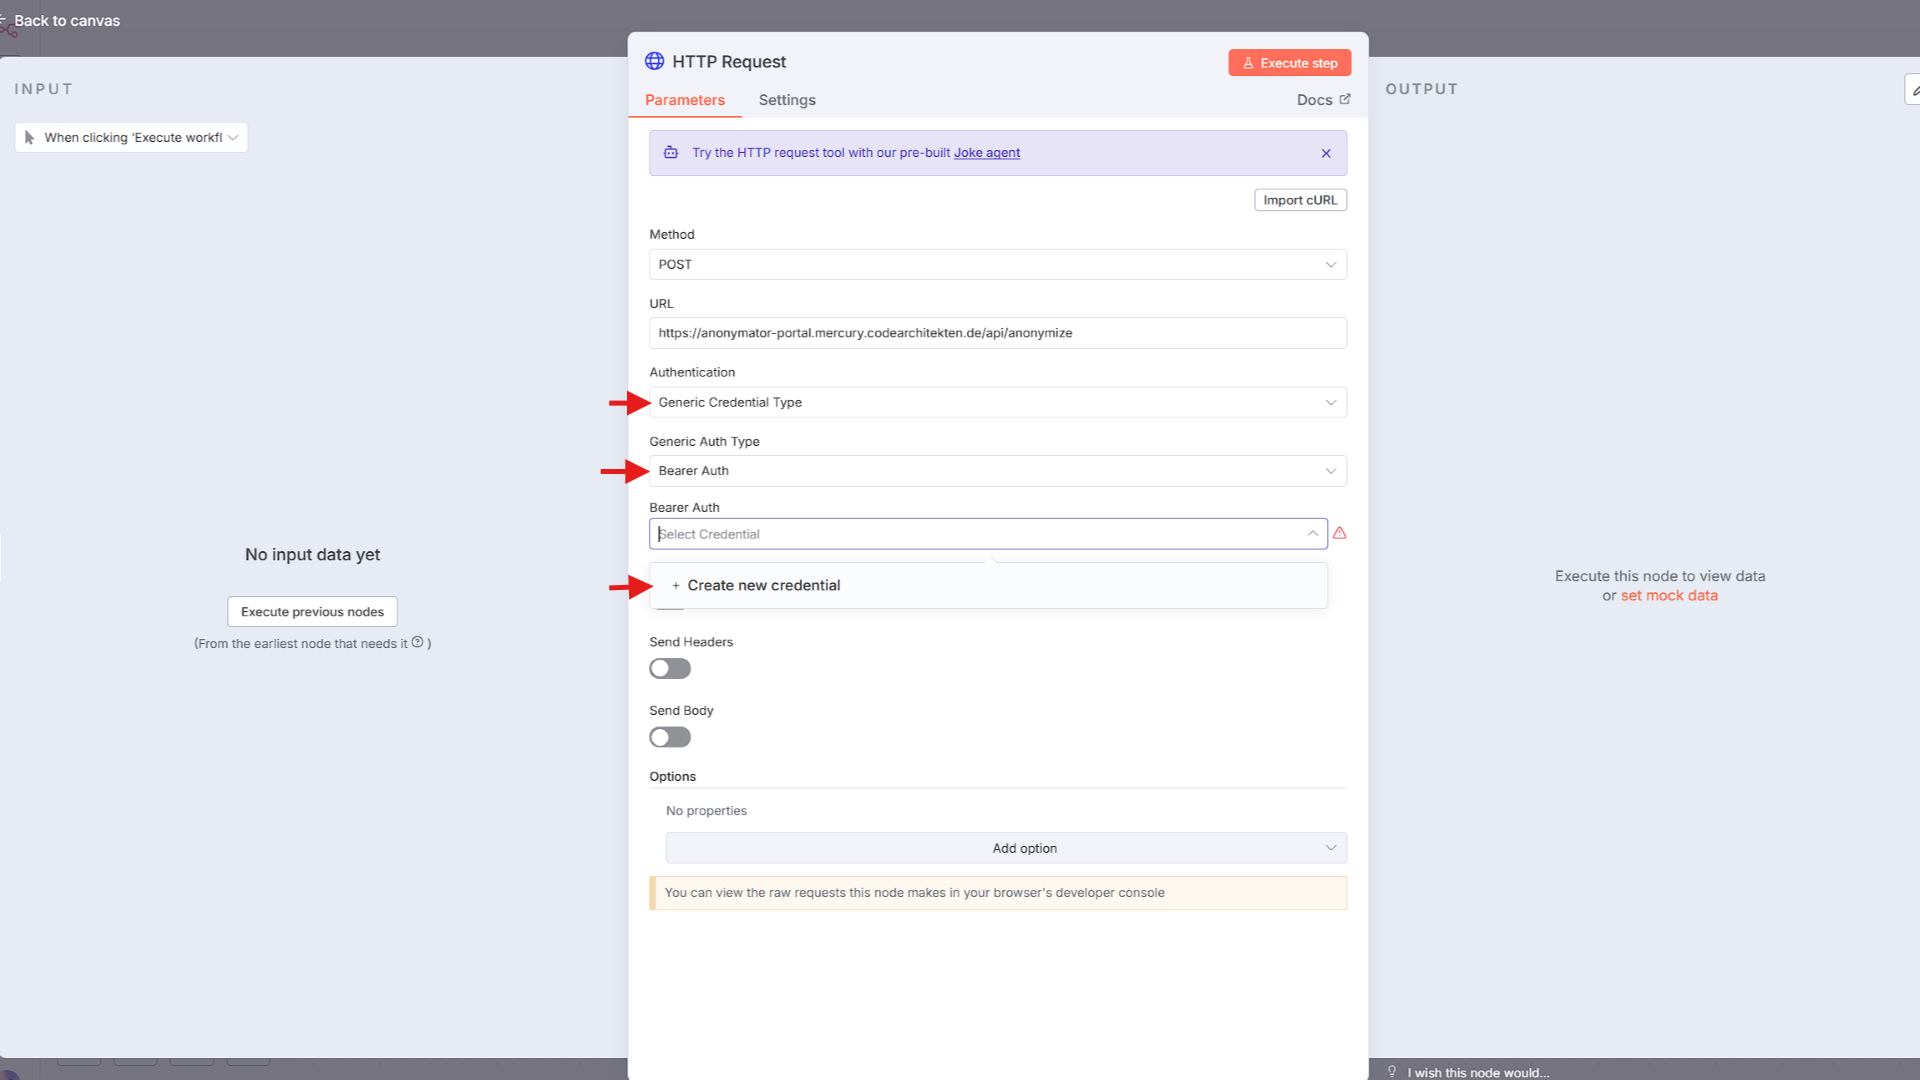
5️⃣ Create the Bearer Credential
Fill out the credential form as follows:
- Bearer token: your API key from the Anonymator user portal
- Allowed HTTP Request Domains:
All - (Optional) Rename the credential before saving
Once filled out, click Save.
Your new credential will now appear in the dropdown. Select it.
6️⃣ Enable the Request Body
Scroll down to the Body Parameters section.
Enable Send Body.
Set Body Content Type to JSON.
7️⃣ Build the JSON Body
In Specify Body, choose Using JSON.
Build a JSON array with the variables you want to anonymize.
For example, to anonymize the chat input variable:
Code
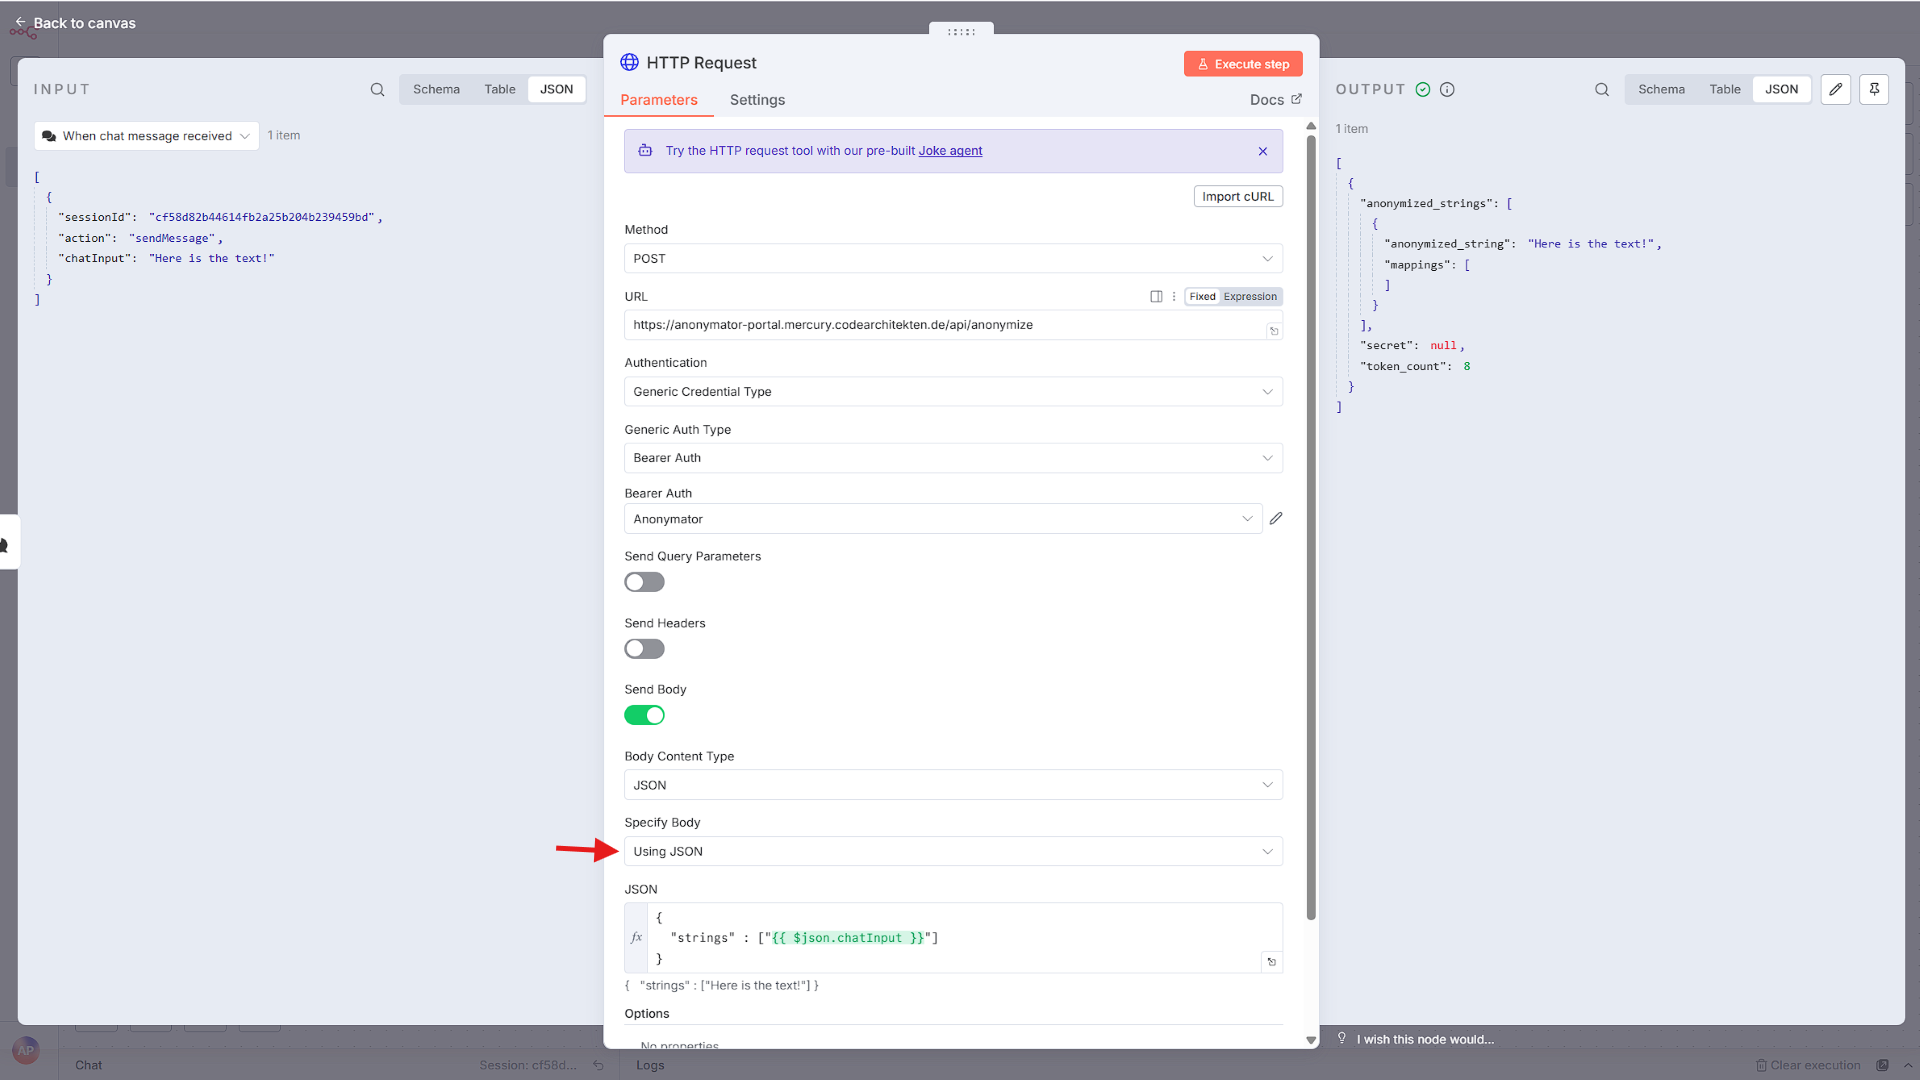
8️⃣ Execute & Verify
Click Execute Node to run the request.
A successful response returns an object containing the processed results.
Code
