Text Deanonymization Guide
This guide walks you through how to restore anonymized text using the Anonymator API in Make.com.
You’ll learn how to configure the HTTP module, send the deanonymization request, and verify the restored text in just a few steps.
1️⃣ Add the HTTP “Make a request” Module
From the modules panel, drag the HTTP module into your scenario.
Select Make a request as the action.
This module will send the deanonymization request to the Anonymator API.
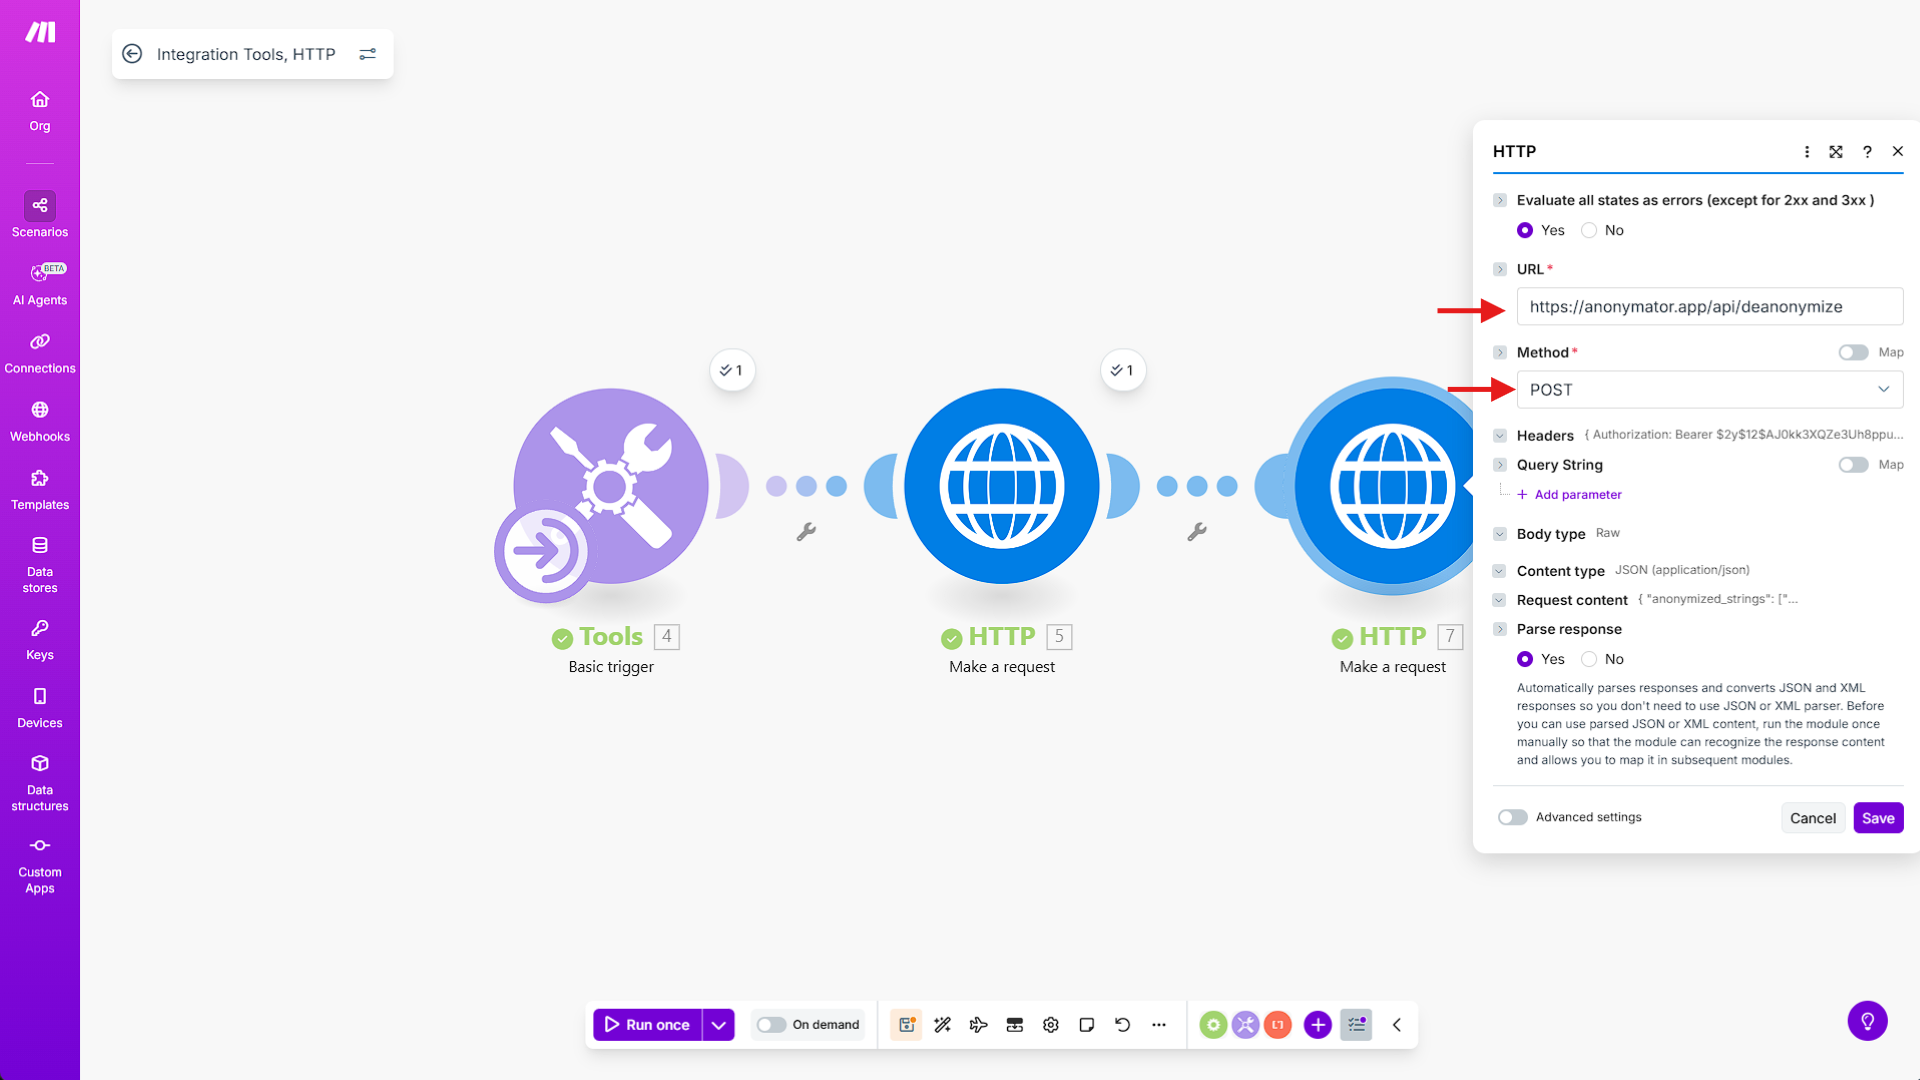
Now configure it as follows:
- Method:
POST - URL:
https://anonymator.app/api/deanonymize
These two settings define the request type and the destination endpoint.
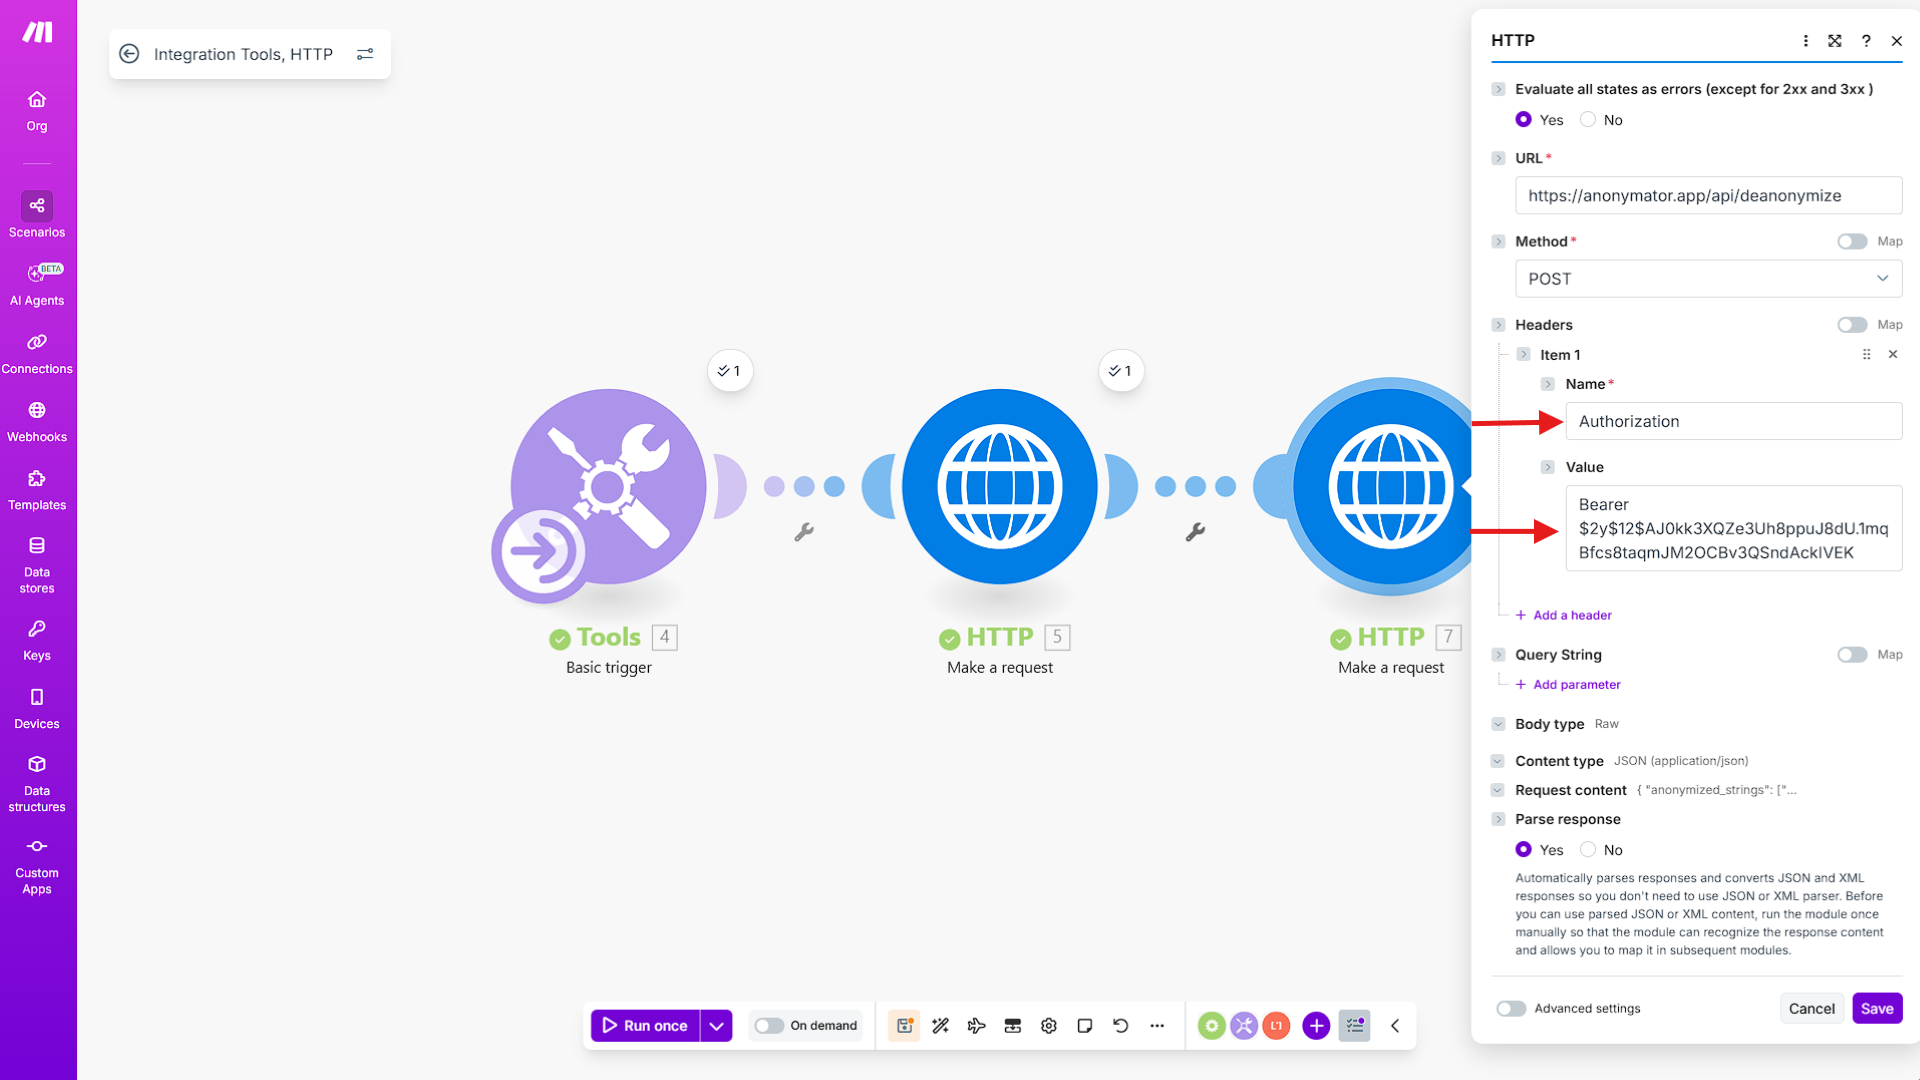
2️⃣ Add the Authorization Header
Under Headers, click Add a header to authenticate your request.
Fill in the fields as follows:
- Name:
Authorization - Value:
Bearer <YOUR_API_KEY>
This header verifies your request with the API key you created in the Anonymator Portal.
Make sure the API key you use has the Deanonymization feature enabled — otherwise, the request will fail.
💡 Using the same API key as in the Anonymization process ensures consistent permissions between both endpoints.
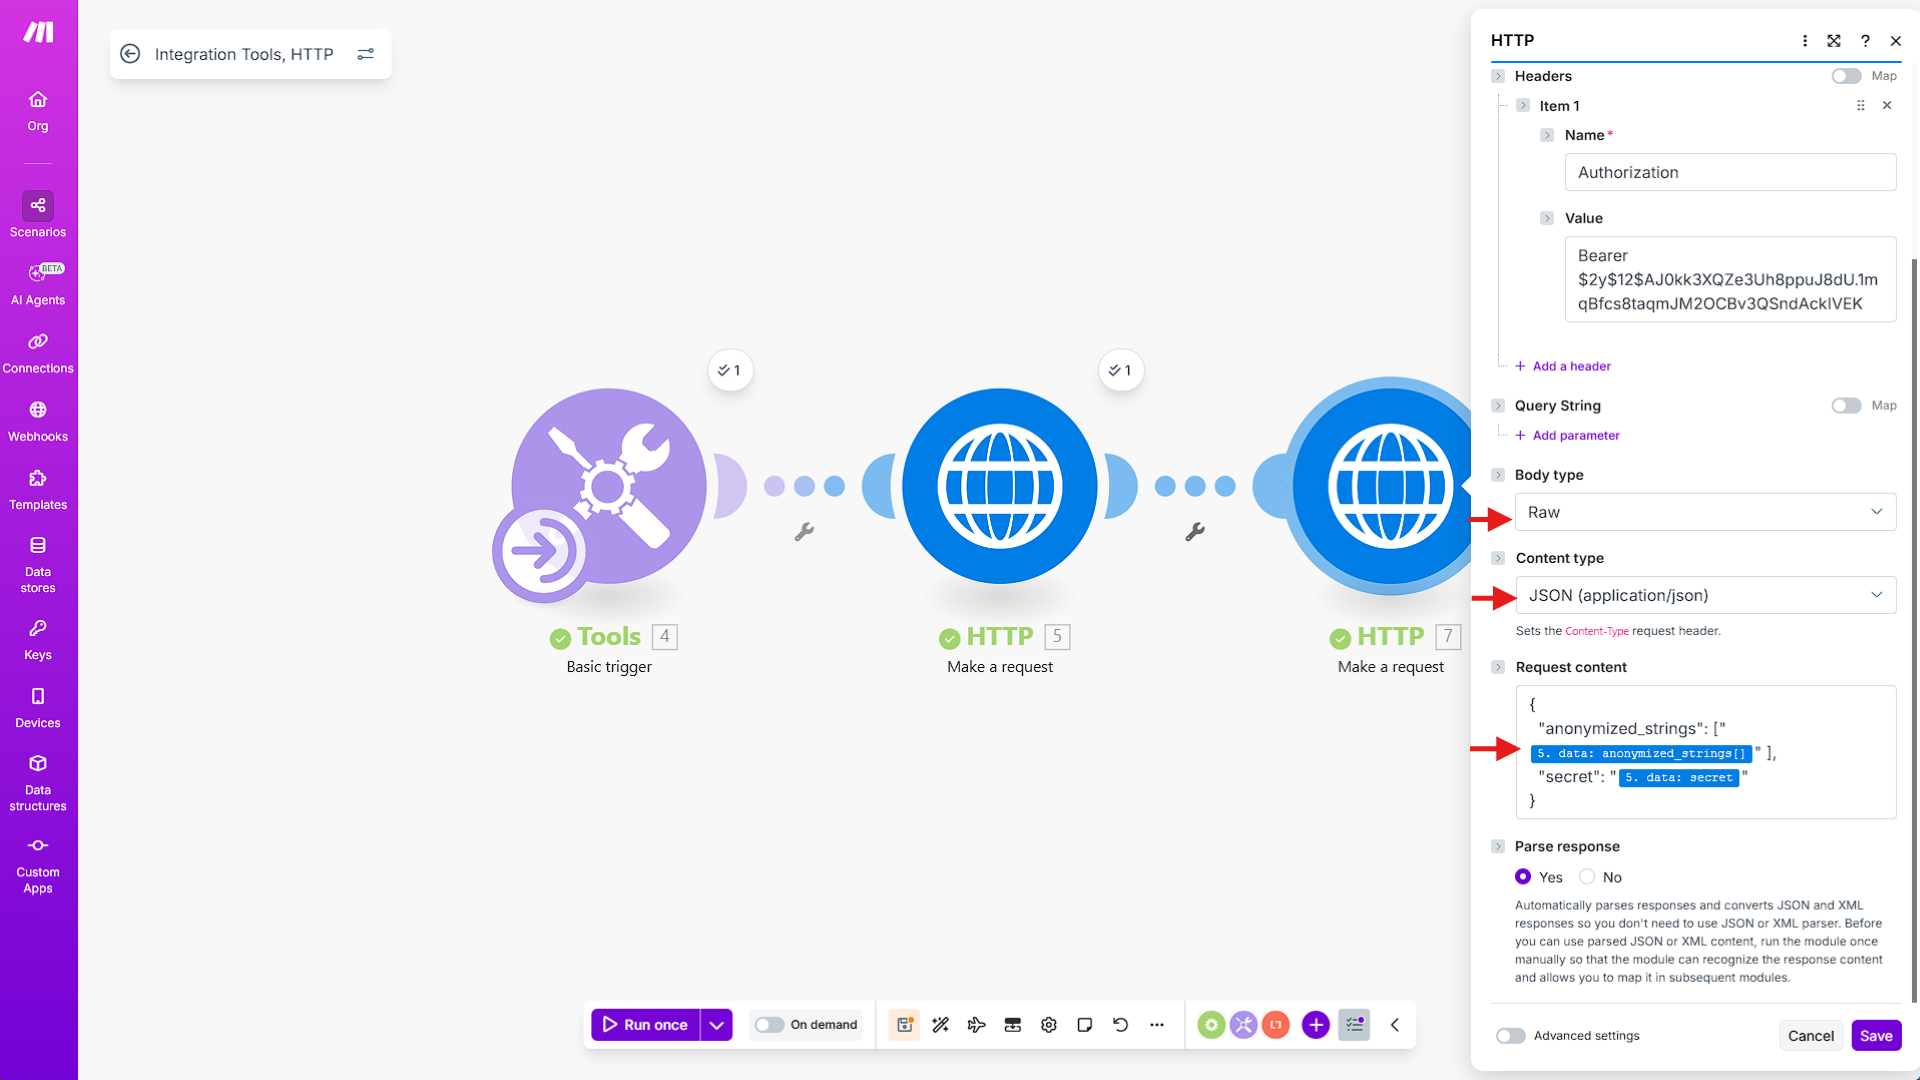
3️⃣ Configure the Request Body
Scroll down to the Body type and Content type options and set them as follows:
- Body type:
Raw - Content type:
JSON (application/json)
In the Request content field, define the JSON body that will be sent to the Anonymator API.
It should contain two key–value pairs:
Code
The anonymized_strings key holds the anonymized text generated by the previous module.
The secret key contains the secret token that links each anonymized value to its original text.
Both fields can be inserted easily using drag-and-drop from the previous module’s output.
When you click inside the Request content box, Make.com will display the available variables you can select and drop directly into the JSON.
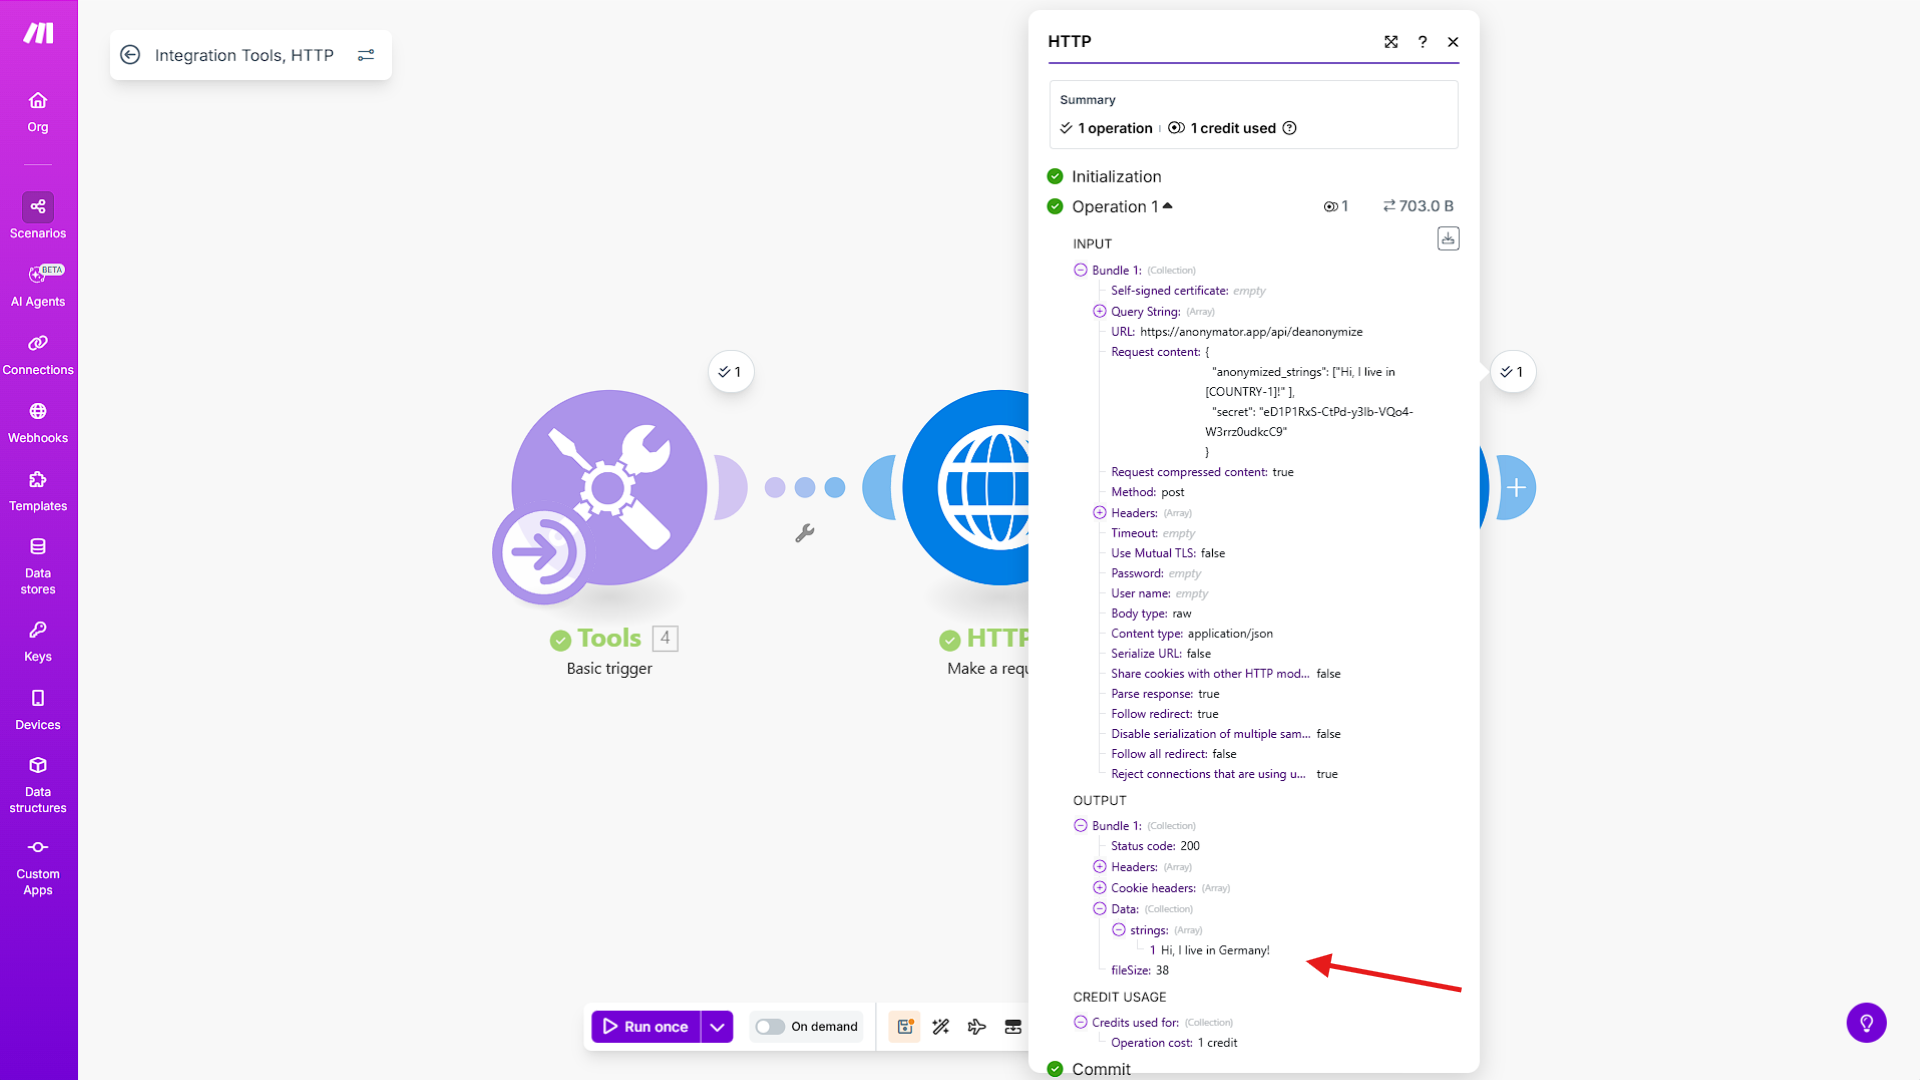
4️⃣ Execute & Verify the Result
Click Run once to execute the scenario.
If everything is configured correctly, the request will be sent to the Anonymator API and the Output panel will display the restored text.
You’ll find the deanonymized result inside:
- Output → Data → strings
A successful response should look similar to:
Code